Leftover Turkey Dinner Ideas

3 Dec

After our big Thanksgiving day meal, we took a few days off from turkey.  So, last night and tonight I wanted to get through the leftover turkey.  Turkey Pot Pie and Turkey Noodle Soup.  Both turned out well!  And were rather easy to put together.
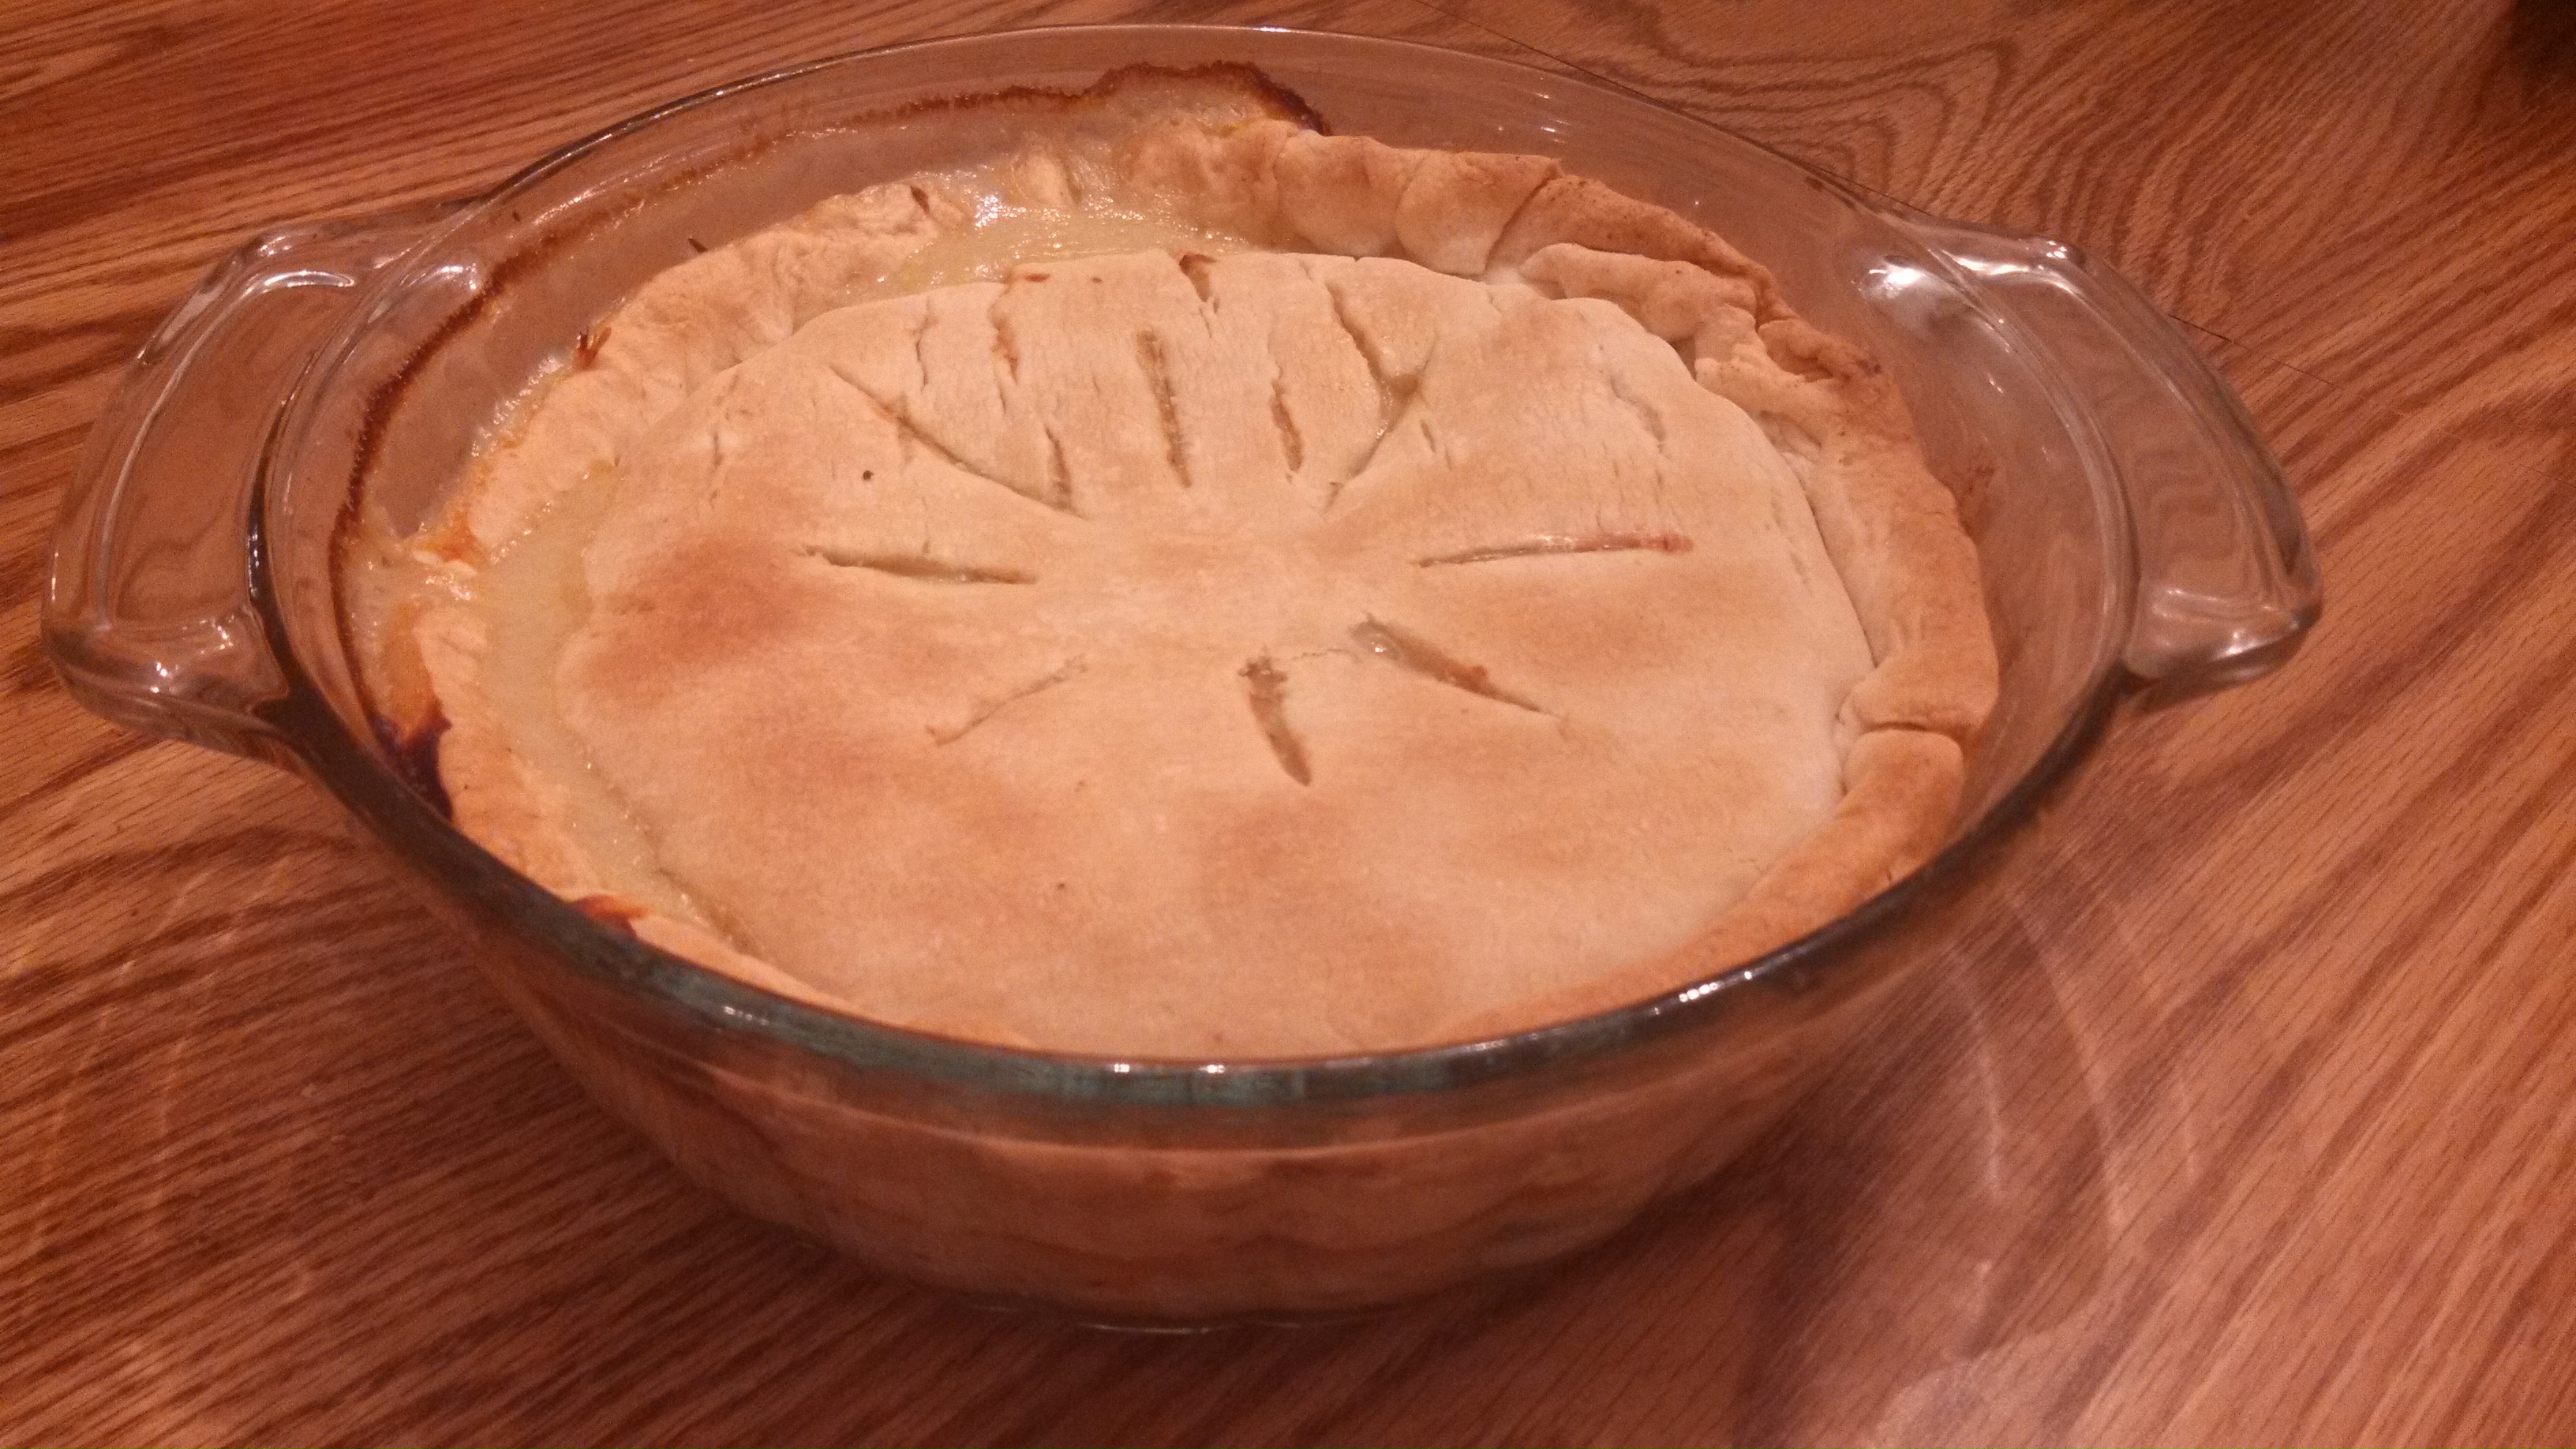
Turkey Pot PieTurkey Pot Pie

What you need:

1/4 cup butter
1 cup diced onion
2 cups cooked turkey, diced, shredded, or cubed
1/4 cup flour
1 teaspoon dried thyme
1/2 teaspoon salt
1/4 teaspoon ground black pepper
2 cups turkey or chicken broth
3/4 cup milk
2 cups frozen vegetable mix (I used a peas, carrots, green beans, and corn mix)
1 9 inch refrigerated pie crust

How to make it:

Preheat oven to 400 F.

Melt butter in a large pot over medium heat.  Add onions and cook until soft and translucent.  Add turkey.  Sprinkle in flour, thyme, salt, and pepper.  Stir constantly and cook for about 5 minutes.  Pour in broth and milk, continuing to stir to avoid lumps forming.  Stir in the frozen vegetables.  Bring to a boil over medium heat, and continue and continue to cook for about 5-10 minutes, until mixture thickens.

Pour mixture into a 2 quart round casserole dish.  Place the pie crust over the top of the mixture and press crust into the sides of the dish.  Cut vents in the crust.

Bake in the preheated oven for 30-40 minutes, or until crust is golden and mixture is bubbly.  Let stand for 5-10 minutes to cool before serving.
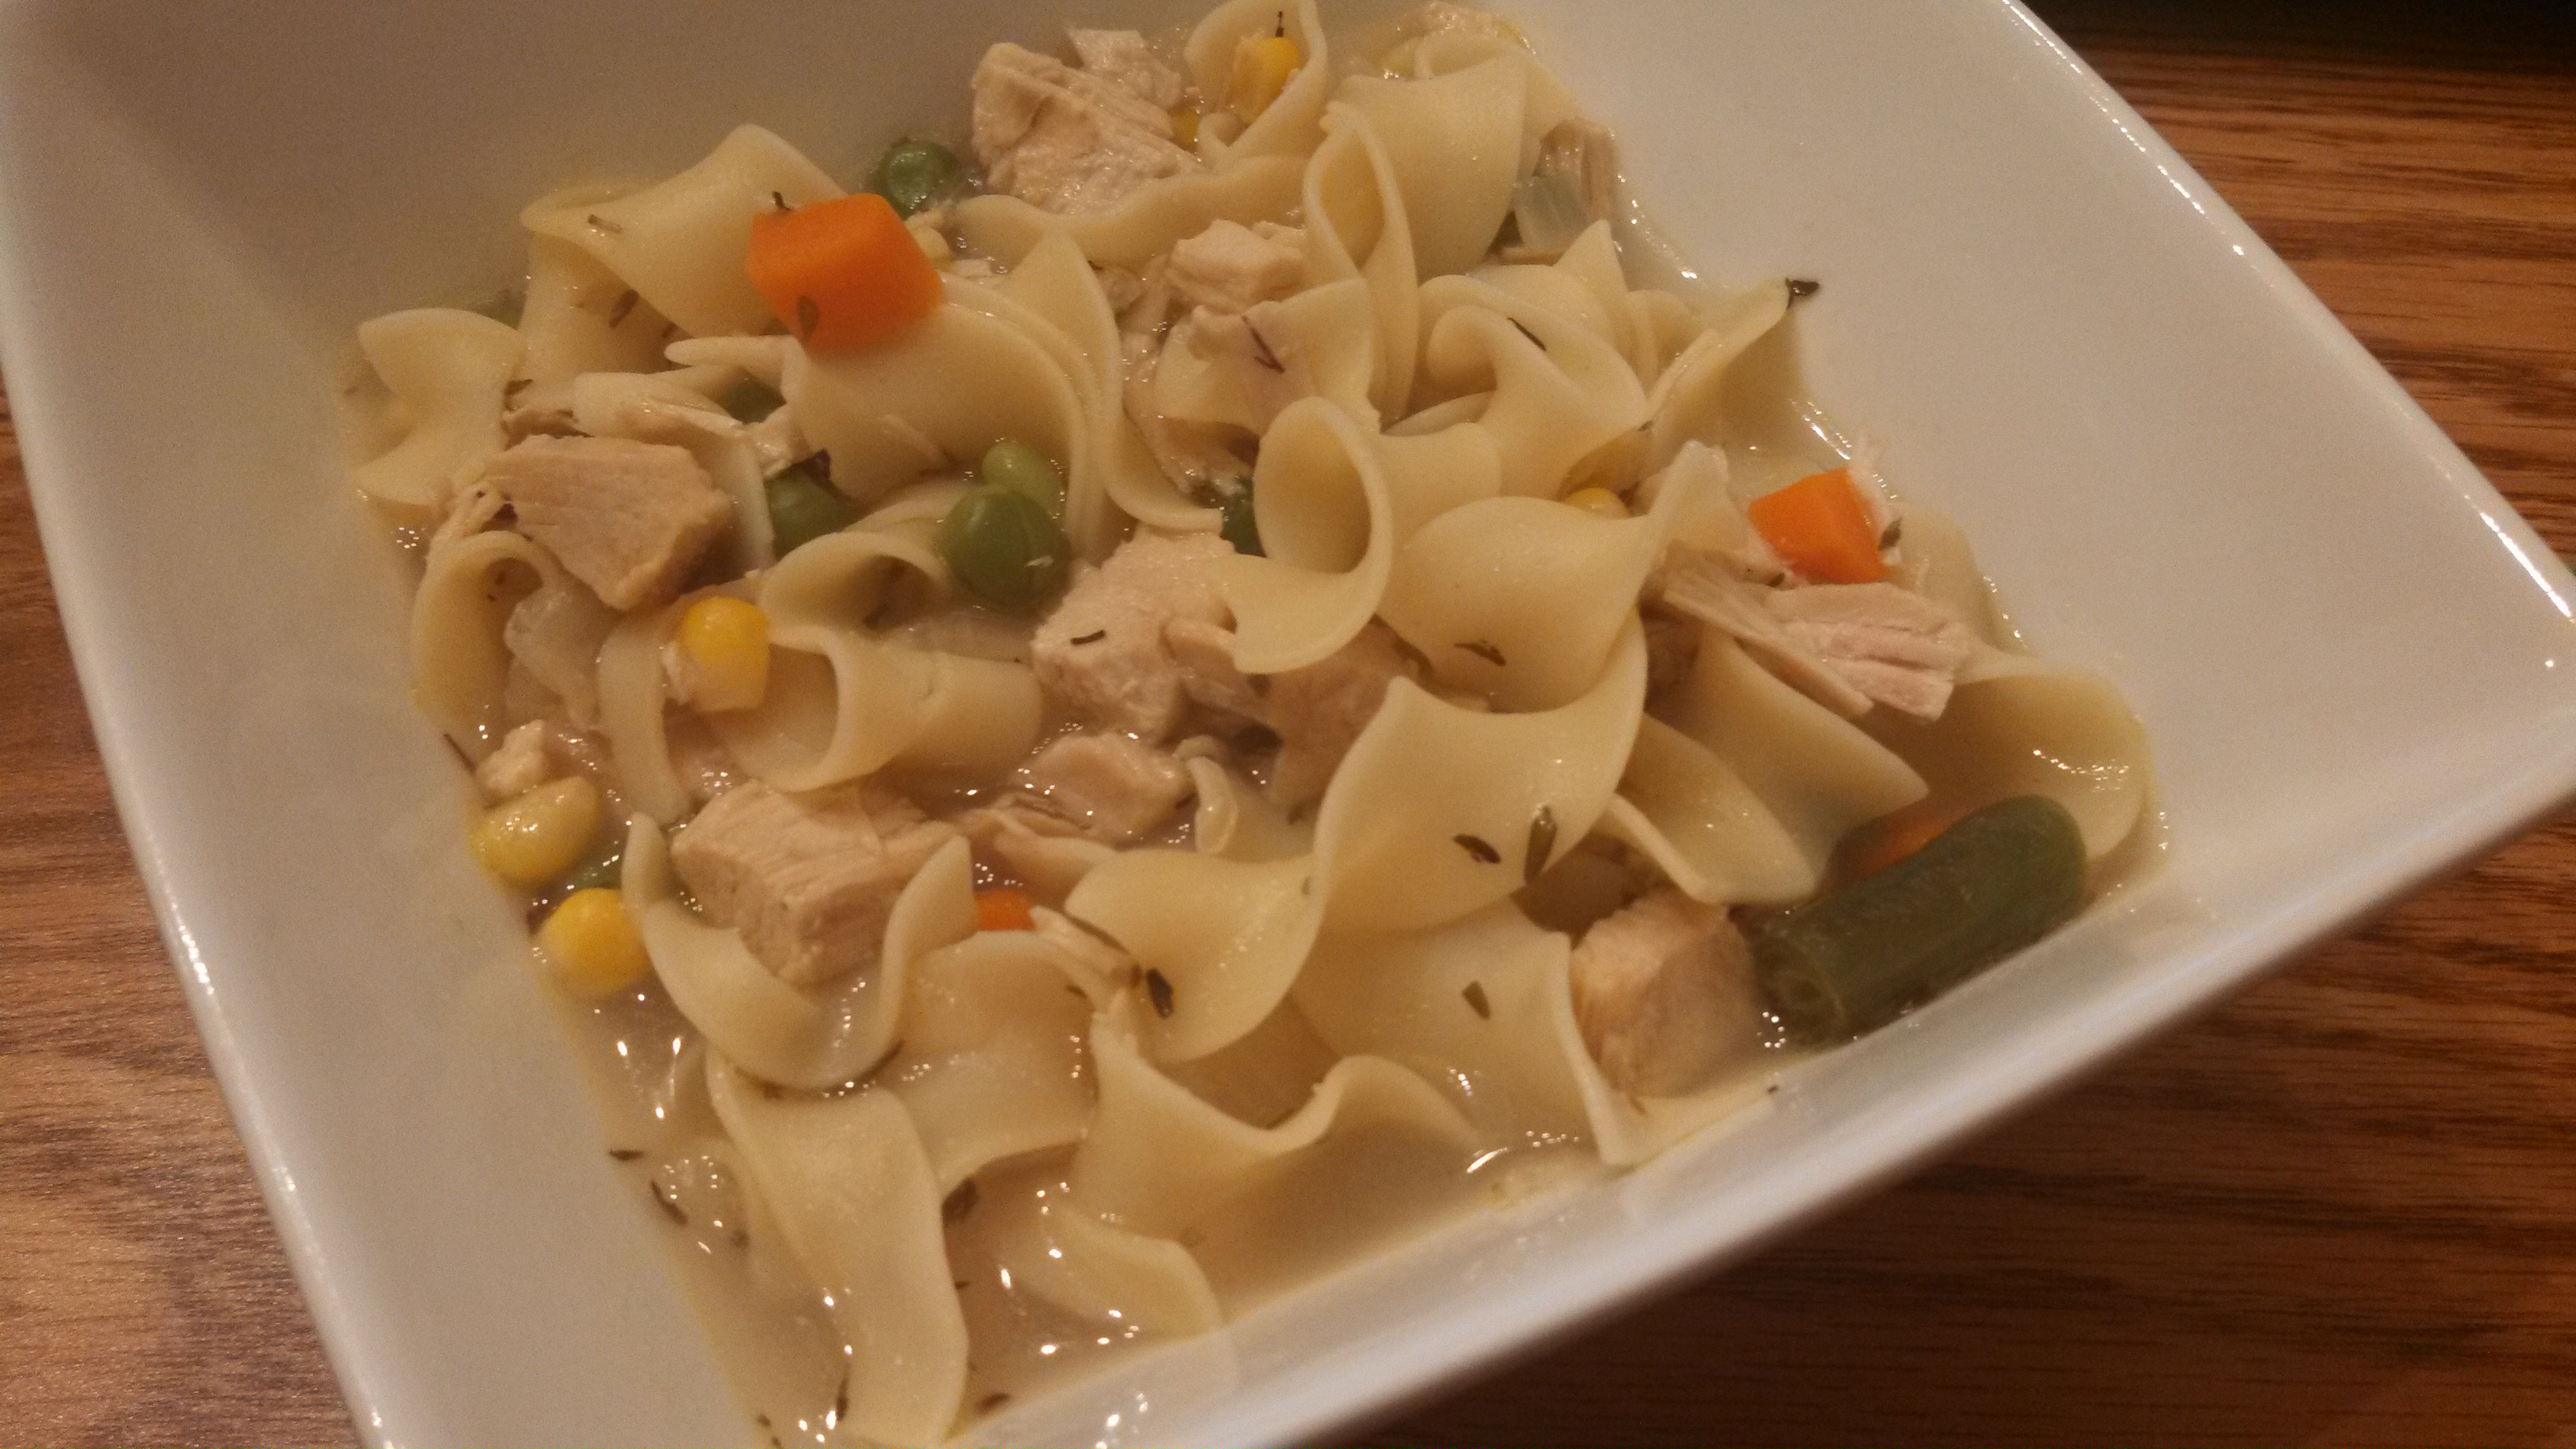
 

Turkey Noodle SoupTurkey Noodle Soup

What you need:

2 tablespoons butter or olive oil
1 cup diced onion
2 cups cook turkey, diced, shredded or cubed
8 cups turkey or chicken broth
2 teaspoons dried thyme
1/2 teaspoon salt
1/4 teaspoon ground black pepper
4 oz uncooked egg noodles
2 cups frozen vegetable mix (I used a peas, carrots, green beans, and corn mix)

How to make it:

Melt butter in a large pot over medium heat.  Add onion and cook until soft and translucent.  Add turkey.  Pour in turkey or chicken broth.  Sprinkle in thyme, salt and pepper.  Bring to a boil, then reduce heat to medium low.  Simmer for 20 minutes.

Bring back to a boil.  Add noodles to the pot.  After 5 minutes, add frozen vegetables.  Continue to boil for another 5 minutes, or until noodles are soft and vegetables are heated through.


Pecan Pie

1 Dec

Oh my.  I have never made a pecan pie before, and honestly, can’t even remember that last time I ate it.  I had some pecans in shell that I had been needing to use for a long time.  When my friend, Jen, commented on my Thanksgiving menu post that she was making a pecan pie, I decided it was finally time to use those pecans and make the pie.  She recommended this Maple Bourbon Pecan Pie recipe from Martha Stewart.  I didn’t have all the ingredients, so I improvised.  Here are the changes I made:

  • I used refrigerated pie dough.  I just unrolled and placed the dough in the pie pan, and didn’t have leftover scraps, so skipped making the leaves.  I also omitted the 2 egg yolks and heavy cream used to glaze the leaves.
  • I did not have dark corn syrup, so I used light corn syrup instead.  They can pretty much be used interchangeably, it’s just that the dark can sometimes enhance the flavor.  I think it turned out great with the light.  For more on light versus dark corn syrup, you can read more here.
  • I did not have maple syrup, but I did have apple butter syrup that I had gotten at Apple Annie’s, a local apple orchard.  This syrup is very delicious, we’ve used it on pancakes and waffles.  Plus, the flavors of apple and pecan go together well, so I figured it would work.  It definitely did!  The apple flavor is somewhat subtle, but the addition of a syrup greatly enhanced the flavor of this pie.

My husband and I loved this pie.  Getting all the pecans out of the shells was not real fun, but both my kids helped a little, so that made it not so bad.  I was able to keep some nice to lay out on top, then the broken ones when inside the pie.  It was maybe cooked a little too long since some pecans on top got a little over-browned.  But, they weren’t burnt, so they were still edible.  The inside of the pie was perfect.

Pecan Pie - fully baked Slice of the Pecan Pie


I would definitely make this pie again, just probably not soon because I ate so much of it!  Also, I would use pecans already out of shell….or there might not be any bourbon left when it’s time to put the pie ingredients all together!

No-Can Green Bean Casserole

29 Nov

This was a new recipe I tried out this year.  Before, I would just used canned green beans, canned cream of mushroom soup, and canned fried onions to create this yummy casserole.  However, I had a desire to ditch the cans and make it all from scratch.  I have been making my own “cream of” soup base for some other casseroles, so I was confident about that part.  Then, I found this recipe that used pan fried shallots in butter in place of canned fried onions.  I used that idea, but used onions instead of shallots.  I don’t have a great picture of the finished casserole, but you can see it in the bottom of this picture of our dinner, toward the left.  We all really enjoyed it, and this will be how we make it from now on.

Thanksgiving dinner spread with green bean casserole

Green Bean Casserole

What you need:

Cream of mushroom soup base:
2 tablespoons butter
1/2 cup diced mushrooms
3 tablespoons flour
1 cup chicken broth
1 cup milk

2 pounds fresh green beans, washed and cut as desired
1/2 cup milk
1/4 teaspoon ground black pepper
2 small onions, thinly sliced into rings
4 tablespoons butter

How to make it:

Preheat oven to 350 F.

In a 3 quart sauce pan, melt 3 tablespoons butter for the cream of mushroom soup base over medium-low heat.  Stir in mushrooms, and cook for 2-3 minutes.  Mix in flour, and cook for 3-4 minutes to lightly brown the flour.  Next, whisk in the chicken broth and 1 cup milk.  Bring to a simmer and cook until slightly thickened.

Meanwhile, prepare  a large pot of boiling water and a bowl of ice water.  Blanch green beans in the boiling water for 5 minutes, then remove and place in the bowl of ice water for 5 minutes.  Drain water from green beans.

Add the blanched green beans to the pot with the thickened cream of mushroom base.  Stir in 1/2 cup milk, Worcestershire sauce, and ground black pepper.  Continue to cook over medium-low heat, stirring occasionally.

While that is simmering, melt 4 tablespoons butter in a large skillet.  Add onions, and toss in melted butter.  Cook onions in the butter, until they become a golden color.  Remove to a paper towel to cool.

Onions fried in butter

Mix in half of the cooked onions in with the cream of mushroom and green bean mixture. Remove from heat.

Spray an 8 x 8 baking dish with non-stick cooking spray.  Pour green bean mixture into the dish.  Bake in the preheated oven for 30 minutes.  Casserole should be bubbly.  Gently stir.  Add the remaining cooked onions over the top of the casserole.  Bake for an additional 5-10 minutes, being careful to not overcook the onions on top.  Allow to cool for 5-10 minutes, then serve.

Bacon Cheeseburger Soup

26 Nov

Today, I wanted soup and I also wanted to use ground beef.  So, I decided that cheeseburger soup sounded good, if it even existed.  It does, but most recipes I found have celery, carrots, potatoes.  All good things, but I really just wanted it to taste like a cheeseburger.  It did!  My husband and I both liked it, but my kids weren’t really fans. (But, they were both grumpy, so that may have played a part in their not liking it.)

Bacon Cheeseburger Soup

Bacon Cheeseburger Soup

What you need:

1 pound ground beef
1 teaspoon Worcestershire sauce
1/2 teaspoon seasoned salt
1/4 teaspoon ground black pepper
1/2 cup diced red onion
1/2 cup diced mushrooms**
3 tablespoons flour**
2 cups milk**
4 cups beef broth
2 cups shredded cheddar cheese
4 slices bacon, crumbled

How to make it:

In a large pot, mix together ground beef, Worcestershire sauce, seasoned salt, and pepper.  Brown meat over medium high heat.  Stir in diced onion, and cook until soft.  Next, stir in diced mushrooms, and continue to cook for 2-3 minutes.  Sprinkle in flour, stir in and cook for 4-5 minutes.  Pour in milk and beef broth.  Bring to a boil, then reduce heat to medium low to simmer for 20-30 minutes.  Stir in shredded cheese and crumbled bacon, and heat until cheese is melted.

**If desired, a can of cream of mushroom soup concentrate or homemade cream of mushroom soup concentrate can be substituted for the mushrooms, flour, and milk.

Thanksgiving Menu 2013

25 Nov

It’s that time of year again, and I’m excited to cook up a big meal!  Of course, it’s most likely just going to be my little family of 4, but we will still go through the leftovers in no time!  This year, I am planning on having:

  • Turkey: I got a 13.5 pound turkey for $0.49/pound from Safeway.  It was a Personalized Deal from their Just for U program, that if I spent $25, I got an 8-24 pound turkey for $0.49/pound.  I also got a 12 pound turkey from Fry’s, it was $0.79/pound when I spent $25.  The first turkey is already in the refrigerator thawing, the second turkey is in my deep freeze to eat at another time.  If you have questions about thawing your turkey, the USDA has good information here.
  • Mashed potatoes: I splurged and got gold potatoes for our mashed potatoes this year.  They weren’t on sale like russet potatoes were, but I really prefer gold potatoes.  I will leave the skins on, and prepare them like this: http://wp.me/p1ORT6-2z
  • Bread and Celery dressing: My absolute favorite!  The last couple of years I used a loaf of bread to make the dressing, but this year I will be “cheating” and bought a box of Mrs. Cubbison’s to cut down on prep time a little.  We’ll see if it measures up to my regular recipe: http://wp.me/p1ORT6-bt
  • Wild Rice and Sausage dressing: I went back and forth on making this dish this year.  However, since I have a lot of breakfast sausage in my freezer from Zaycon Foods and wild rice was on sale at Safeway, I decided it was making the list.  This is a recipe I got from my aunt, and it has been in close competition with bread and celery dressing as my favorite dish: http://wp.me/p1ORT6-bp
  • Green Bean Casserole: I will be using green beans from my freezer that were fresh green beans from a Market on the Move event earlier this year.  I will also not be using a can of cream of mushroom soup, I will be making my own creamy soup base with cut up mushrooms.  I’m undecided on the onions, I may use fresh, diced onion in place of the French’s fried onions.  It won’t have the crunch on top like with the fried onions, though.  Stay tuned for the results!
  • Cranberry sauce: Last year was my first year making cranberry sauce from fresh cranberries, and I have some in my freezer, so I will be making it again!  I don’t know what took me so long to finally make it, although I may substitute honey for the sugar in it this year: http://wp.me/p1ORT6-zh
  • Dinner Rolls:  I’m horrible at baking (I blame the altitude), so I bought brown and serve rolls from Safeway.
  • Sweet Potato Pie: Yes, different from the traditional pumpkin pie, but delicious in its own right: http://wp.me/p1ORT6-bD  Which reminds me, I better remember to thaw the pie crust!

So, what is on your menu for this year?

PVC Bike and Kid Wash

20 Nov

It’s been a while since I made this, but I wanted to make sure to still share it.  After making the PVC bike rack, which has been awesome to have in the garage to keep the bikes organized, I wanted to make something else.  A friend of mine had found this project, a Kid’s Car Wash Sprinkler, on the Lowe’s website.  After looking over the plans, I made a few changes to use a little less PVC pipe and to not make it quite as big for storage purposes.

bike wash plans


Now, from my original plans, I was not able to locate a grass skirt, so I improvised and used a folded and cut disposable tablecloth from the dollar store.  Here is a picture of how it turned out:

Completed Bike Wash


The kids really enjoyed it!  My water feature part wasn’t quite perfect.  I don’t think the front section got completely sealed off, so water was flowing throughout the entire system instead of just the section with the holes drilled in.  That made the water pressure a little low, but, it was still enough to get the kids wet!  The hose I got was just long enough to make it to my sidewalk, thankfully.  I only used PVC cement in the section for the water, so the rest can come apart and go back together for storage or transport.

Since it does come apart, now that it’s cooled off and too cold to get soaking wet, I made a slight modification for the current weather:

Bubble wash


I removed the water section, and just used the part with the tablecloth and sponges.  Then, I put our bubble machine in front to have bubbles in place of the water.  This way, we get use out of it more of the year, even in the more mild weather in AZ.

I overbought on PVC pipe on this last project, so I have some in my garage, just waiting for the next project.  Let’s see what I can make next!

Note: Prices of supplies may vary by where you decide to shop.  I provided the prices just as a rough estimate for the project cost.

Make Your Own Pizza Night!

17 Nov

Last night, I had 2 packets of yeast that needed to be used, so I decided that we would make pizza!  Both of my girls participated in mixing the dough, spreading it out, and putting on the toppings.  The 2 packets of yeast that I had were Rapid Rise, so I was able to use my favorite, quick crust recipe from Fleischmann’s

  • 1-3/4 to 2-1/4 cups all-purpose flour 
  • 1 envelope Fleischmann’s® Pizza Crust Yeast OR RapidRise Yeast
  • 1-1/2 teaspoons sugar 
  • 3/4 teaspoon salt 
  • 2/3 cup very warm water (120 to 130°F)
  • 3 tablespoons vegetable oil

Preheat oven to 425°F.

Combine 1 cup flour, undissolved yeast, sugar and salt in a large bowl. Add very warm water and oil; mix until well blended, about 1 minute. Gradually add enough remaining flour to make a soft dough. Dough should form a ball and will be slightly sticky. Knead on a floured surface, adding additional flour if necessary, until smooth and elastic, about 4 minutes. If using RapidRise yeast, let dough rest at this point for 10 minutes. (My Note: Since I used RapidRise yeast, after kneading, we formed a ball with the dough, put it back in the bowl, and drizzled with olive oil.  I covered it with plastic wrap, and set to rest and rise for 10 minutes)

Pat dough with floured hands to fill greased pizza pan or baking sheet. OR roll dough on a floured counter to 12-inch circle; place in greased pizza pan or baking sheet. Form a rim by pinching the edge of the dough. (My Note: I have 2 pizza stones that I sprayed with olive oil.  Then, I sprinkled corn meal on the olive oil before spreading the dough on the stone.)

Spread with pizza sauce. Top with grated Parmesan cheese and shredded mozzarella cheese, and other toppings as desired.

Bake on lowest oven rack for 12 to 15 minutes, until cheese is bubbly and crust is browned.


Here is how K’s looked before baking.  She was so proud of her creation.  Hers has sauce, then grated Parmesan cheese, then shredded mozzarella.  She put pepperoni on it, then a chopped olive on each piece of pepperoni.  Finally, she put a pile of shredded cheddar in the center.  

Homemade pizza


And, I only got a picture of S’s pizza after baking.  Hers was just cheese.

S's cheese pizza


We made 2 big pizzas, but the dough could easily be divided to make 4 or 6 smaller pizzas so that each family member gets there own personal pizza.  I love that I have an easy recipe that we like a lot to make our own pizza!  

Slow Cooker Apple Butter

17 Nov

Jars of Apple Butter

Since I haven’t had much success with making jams and jellies, I’m glad to have had success with making apple butter.  Mid-October, my family made a trip to Apple Annie’s Orchard to pick apples.  At that time, what they had for harvest was lots of Granny Smith and some Rome Beauty.  So, we got around 8 pounds to bring home.  We won’t really eat Granny Smith plain, but, with a little added sugar, we like them prepared in things.  Now, mine never turns out as pretty as other pictures that I have seen, but it works out well enough for us!

I used 6 1/2 pounds of the apples we picked, a mix of Granny Smith and Rome Beauty varieties, and used my peeler/corer/slicer  to prepare all the apples, then used a hand chopper to chop them into smaller pieces.  This filled up my 6 quart slow cooker pretty much to the top.  Then, I added sugar and spices, skipping the salt and vanilla extract, according to this recipe for Slow Cooker Apple Butter:

– 1 cup granulated sugar
– 1 cup light brown sugar
– 1 tablespoon ground cinnamon
– 1/2 teaspoon ground nutmeg
– 1/4 teaspoon ground cloves

Normally, I wouldn’t add sugar, but with as many Granny Smith apples as I had, it needed the sugar to balance out the tart.  I cooked it on low overnight, about 10 hours.  In the morning, I removed the lid and used my hand mixer to smooth out the apples in the slow cooker.  I left the lid off and continued to cook it on low for another 2 hours, until it had gotten a thicker consistency.

We love to eat this on toast and waffles, plus it’s a nice addition to a peanut butter sandwich instead of the grape jelly I buy at the store.  It’s a wonderful fall treat!  The prep takes some time and effort, but then you can let it cook all day while you work on other things.

Pesto Salmon

3 Nov

When I decided to make salmon for tonight’s dinner, I was thinking I would do it how I normally do, rubbed with olive oil and lemon pepper seasoning, then cooked on the George Foreman grill.  However, I was hoping to maybe come up with something a little different to try.  As I was going through the fridge, I found a jar of pesto I had prepared last week, using some fresh basil from someone’s garden and basil from a Sunizona FarmBox.  I’ve used pesto when baking chicken before, why not on salmon?  Turned out great, and I made mashed potatoes (red potatoes with the skins on), steamed asparagus, and cheddar garlic biscuits.

Pesto Salmon

Pesto Salmon

What you need:

4 4-oz fillets of salmon
1 cup Pesto, store-bought, Spinach-Basil, or Kale
Lemon

How to make it:

Preheat oven to 375 F.

Line a baking dish with foil.  Spray with non-stick cooking spray.  Arrange salmon fillets in dish, skin side down.  Spread pesto on top of each fillet.

Bake in the preheated oven for 20-25 minutes, or until salmon easily flakes with a fork.

Market on the Move

3 Nov

I’m finally getting around to writing about this program!

Market on the Move was started by The 3000 Club.  To give you a little background, here is some information from their website:

In October of 2010, the Market On the Move (MOM) was born. The 3000 Club founders Ethel Luzario and Lon Taylor partnered with churches and other non-profit organizations to host weekly markets where semi-truck loads of produce were brought into the valley.  A supporter can donate $10 and receive up to 60 lbs. of produce that they can share with anyone they know who may be in need. By end of the season in May 2013, there were over 50 distribution sites and 90 million pounds of produce have been rescued and redistributed.

It started in Sierra Vista in April 2013, and happened every other week until June 1, with a special event on June 29.  Usually, it doesn’t happen over the summer because it’s too hot to be out doing events.  I only made it to a couple of the events, and a friend shared hers with me for the events I couldn’t make.  Since it’s rescued produce, meaning produce that would have otherwise been thrown away by produce suppliers in Nogales, AZ, because they couldn’t sell it because of dates or quality, it’s not always perfect.  There are some imperfections at times, or some has gotten moldy, but overall, a lot is still usable produce.  But, it also means that you have to find use for it almost right away.  Plus, it really varies event to event what is available and how much you can get.  Typically, each item will have a limit so that they can get produce to as many families as possible.

Yesterday (11/3/2013), was the first event of the new season in Sierra Vista.  I wasn’t able to go, but my husband went for me.  He paid 2 donations, or $20.   At this event, they estimated to have served about 700 families from the full truck (about 36,000 pounds of produce). Here is what he came home with:

Orange bell peppers, already cut into strips

Orange bell peppers, already cut into strips

Lots of cucumbers!

Lots of cucumbers!

Yellow Squash

Yellow Squash

Watermelons

Watermelons

Roma and cherry tomatoes

Roma and cherry tomatoes

Zucchini

Zucchini

This was definitely more produce than I could use, so I found 2 friends interested in some produce, and made them each a box like this:

IMG_20131102_164144_651[1]

As you can see, the peppers are in snack sized bags for my husband to take to work for snacks.  Half of the cucumbers I put in jars in the refrigerator to make pickles:

Refrigerator pickles

Not sure what I’ll do with the other half just yet, although some will be saved to juice with the watermelon to make Watermelon-Cucumber Coolers.  For the zucchini and yellow squash, I will slice it, blanch, and freeze.  Some will also be sliced, and I’m planning to use some of the Zaycon breakfast sausage that I just got, and make some Summer Squash, Sausage, and Egg Bakes to freeze and reheat for quick dinners later.  The tomatoes I’ll wash and puree to put in jars in the fridge to make a couple batches of Spanish Rice this week.  And then, I’ll take a long nap after all this work!

Edited to add:  Here are a couple of pictures of my prep and finished product of Summer Squash, Sausage, and Egg Bakes that I made.  I got foil pans with lids to use to bake them in and then freeze.

Ingredients for the casseroles

Ingredients for the casseroles

Finished casseroles in foil pans with lids for the freezer

Finished casseroles in foil pans with lids for the freezer