After making the black crochet hat for my husband, I followed up with a lot more crochet hats. Like 17 more over a month and a half time period. I had a few other projects mixed in there too, which I will talk more about soon.
So, here is what I have discovered is my favorite pattern for making the beanies, which were mostly for older children and adults, using an H hook:
Chain 3, 12 DC first chain, join to first DC, chain 2
Round 2: 2 DC in each around, join, chain 2 (24 DC)
Round 3: 2 DC in first, DC in next, repeat around, join, chain 2 (36 DC)
Round 4: 2 DC in first, DC in next 2, repeat around, join, chain 2 (48 DC)
Round 5: 2 DC in first, DC in next 3, repeat around, join, chain 2 (60 DC)
Round 6: 2 DC in first, DC in next 14, join, chain 2 (64 DC)
Round 7: 2 DC in first, DC in next 15, join, chain 2 (68 DC)
Round 8-16: DC in each around, join, chain 2 (68 DC)
Round 17: SC in each around, join, fasten off, weave in ends (68 SC)
For younger children, I would only increase to 64, and end with 15 or 16 rounds. For toddlers, I would increase only to 60 with 12-14 rounds. Infants, either 48 or 56, with 10-12 rounds. All heads are different sizes, and when in doubt, I make it bigger. A bigger hat can still be worn while a hat too small cannot. If you need to make it bigger, I continue the increase pattern, 2 DC, DC in next 16 to get to 72, 2 dc, DC in next 17 to get to 76. 76 is the largest I have made, that fits a larger size adult head or a head with a lot of hair.
Here are pictures of all the work, plus links that helped me create all of them:

Purple Hat with Orange Flower

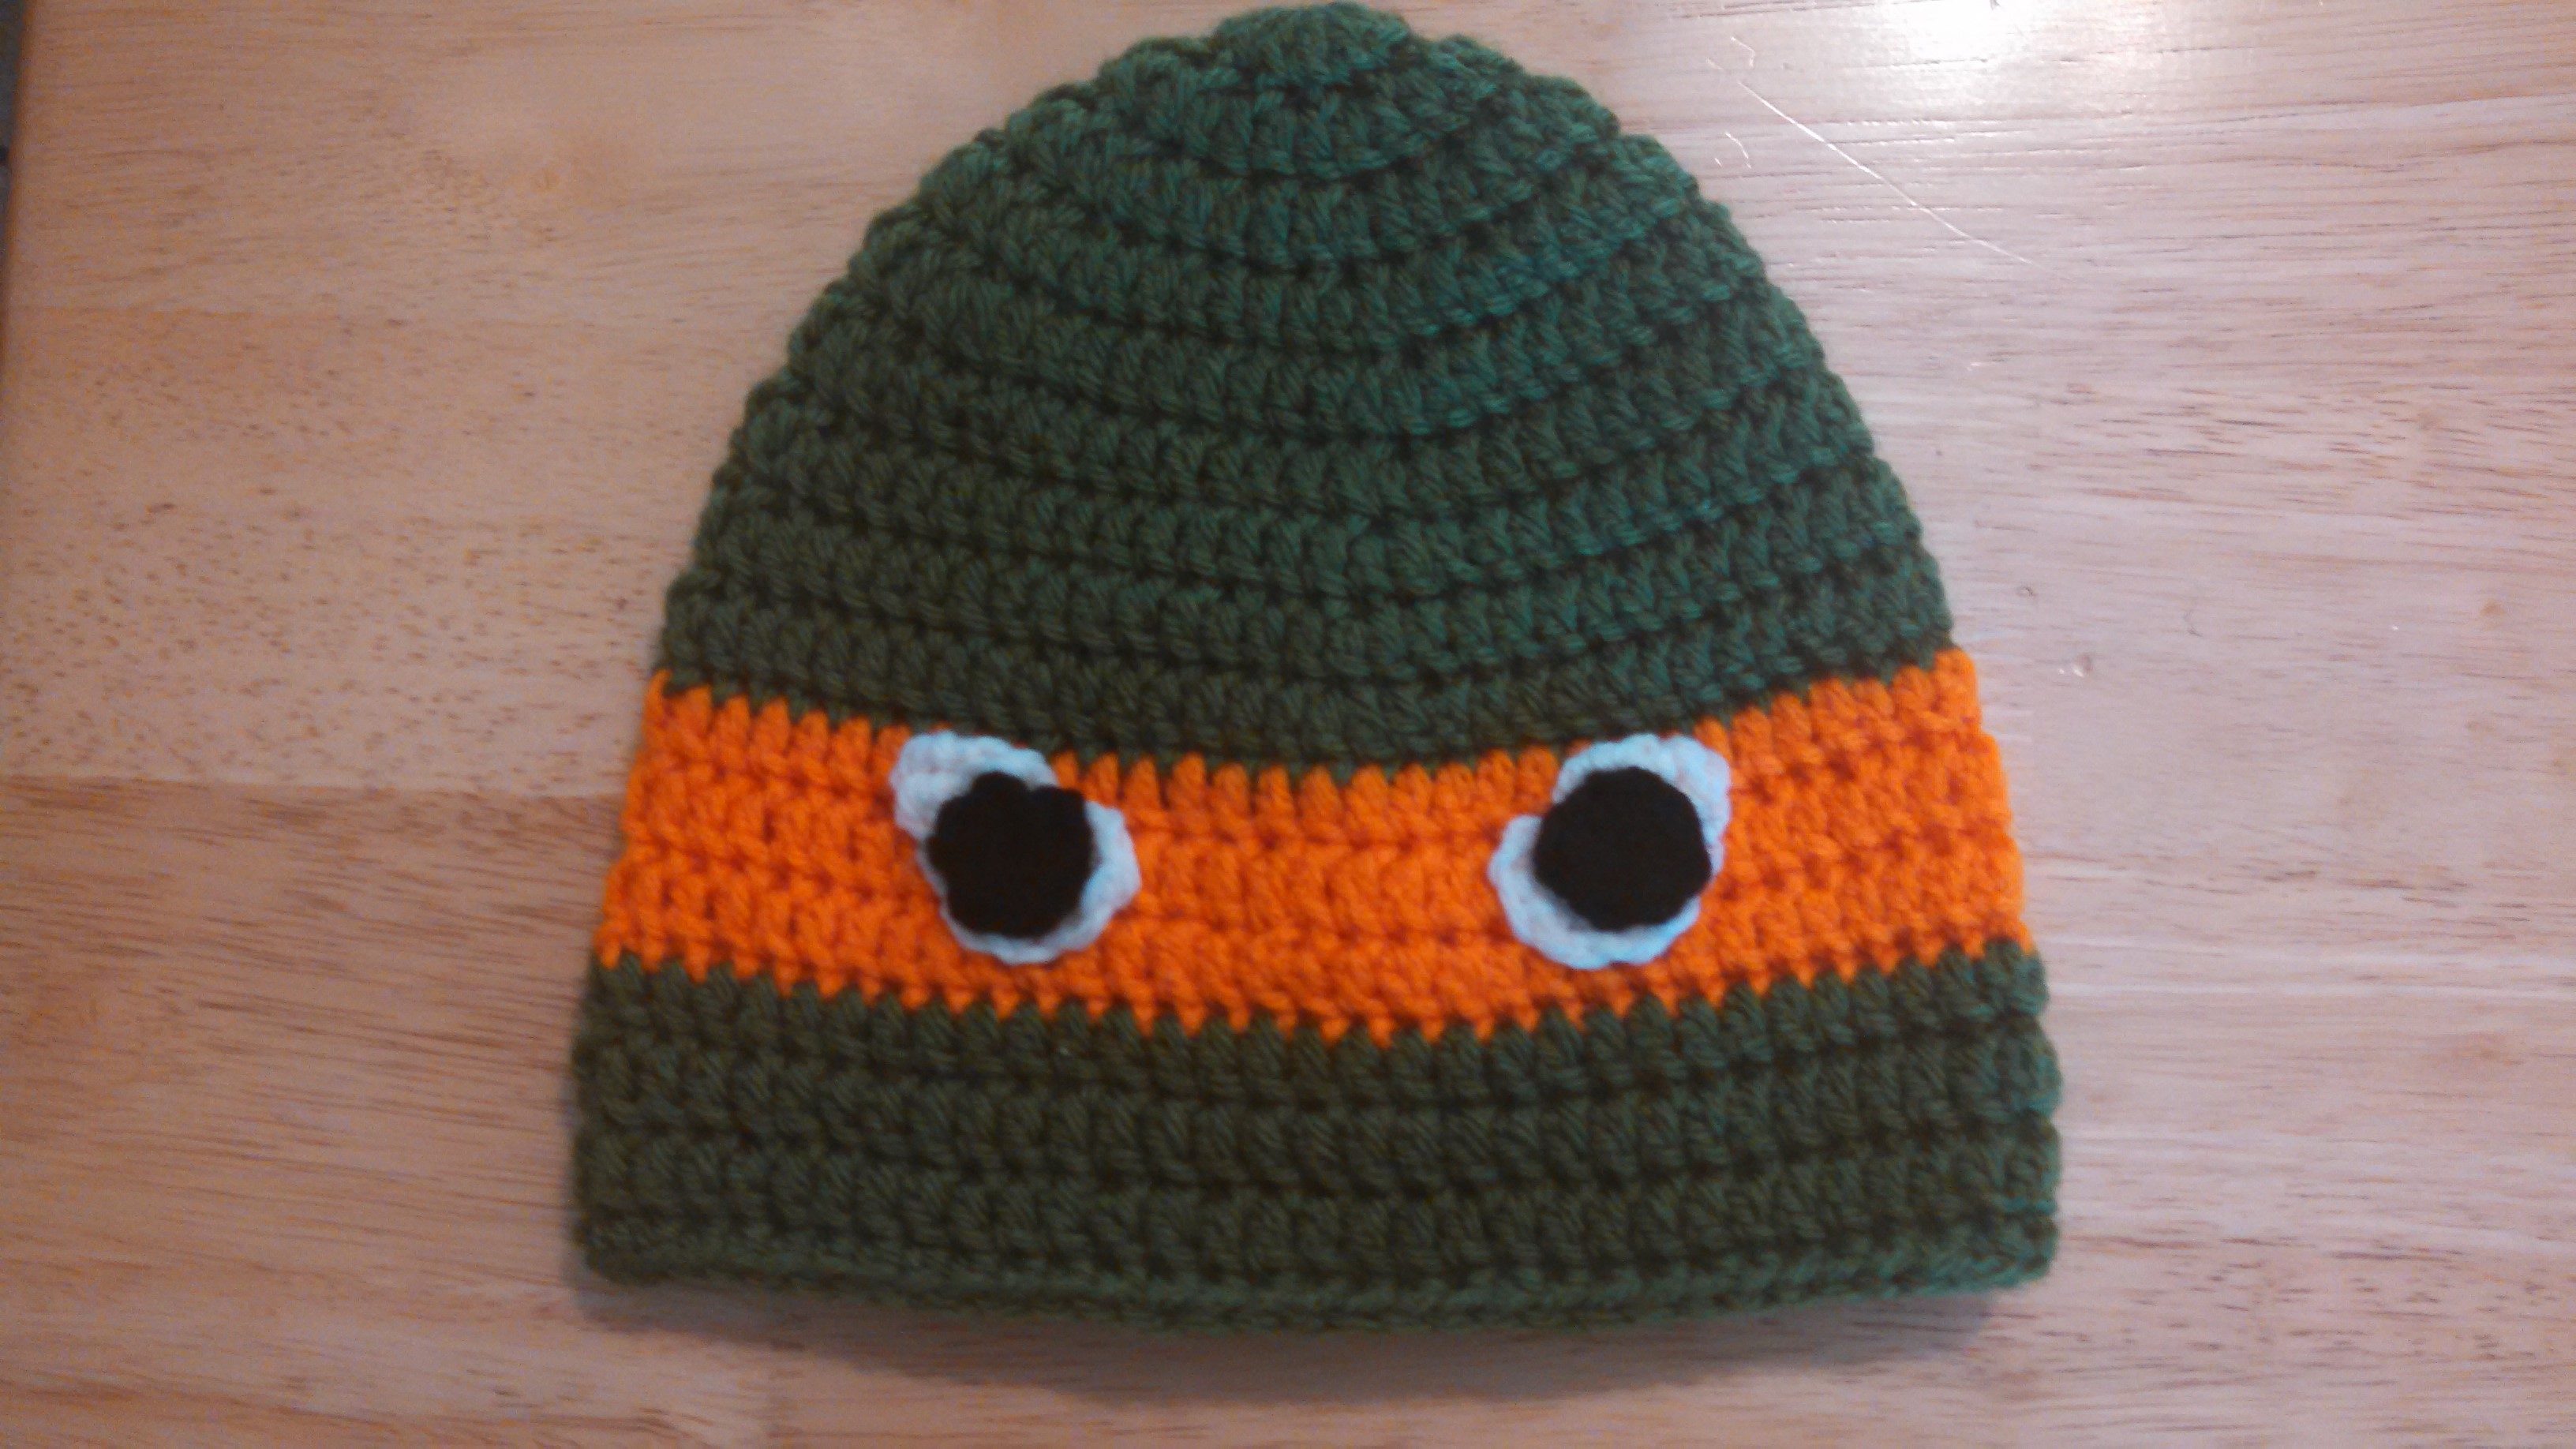
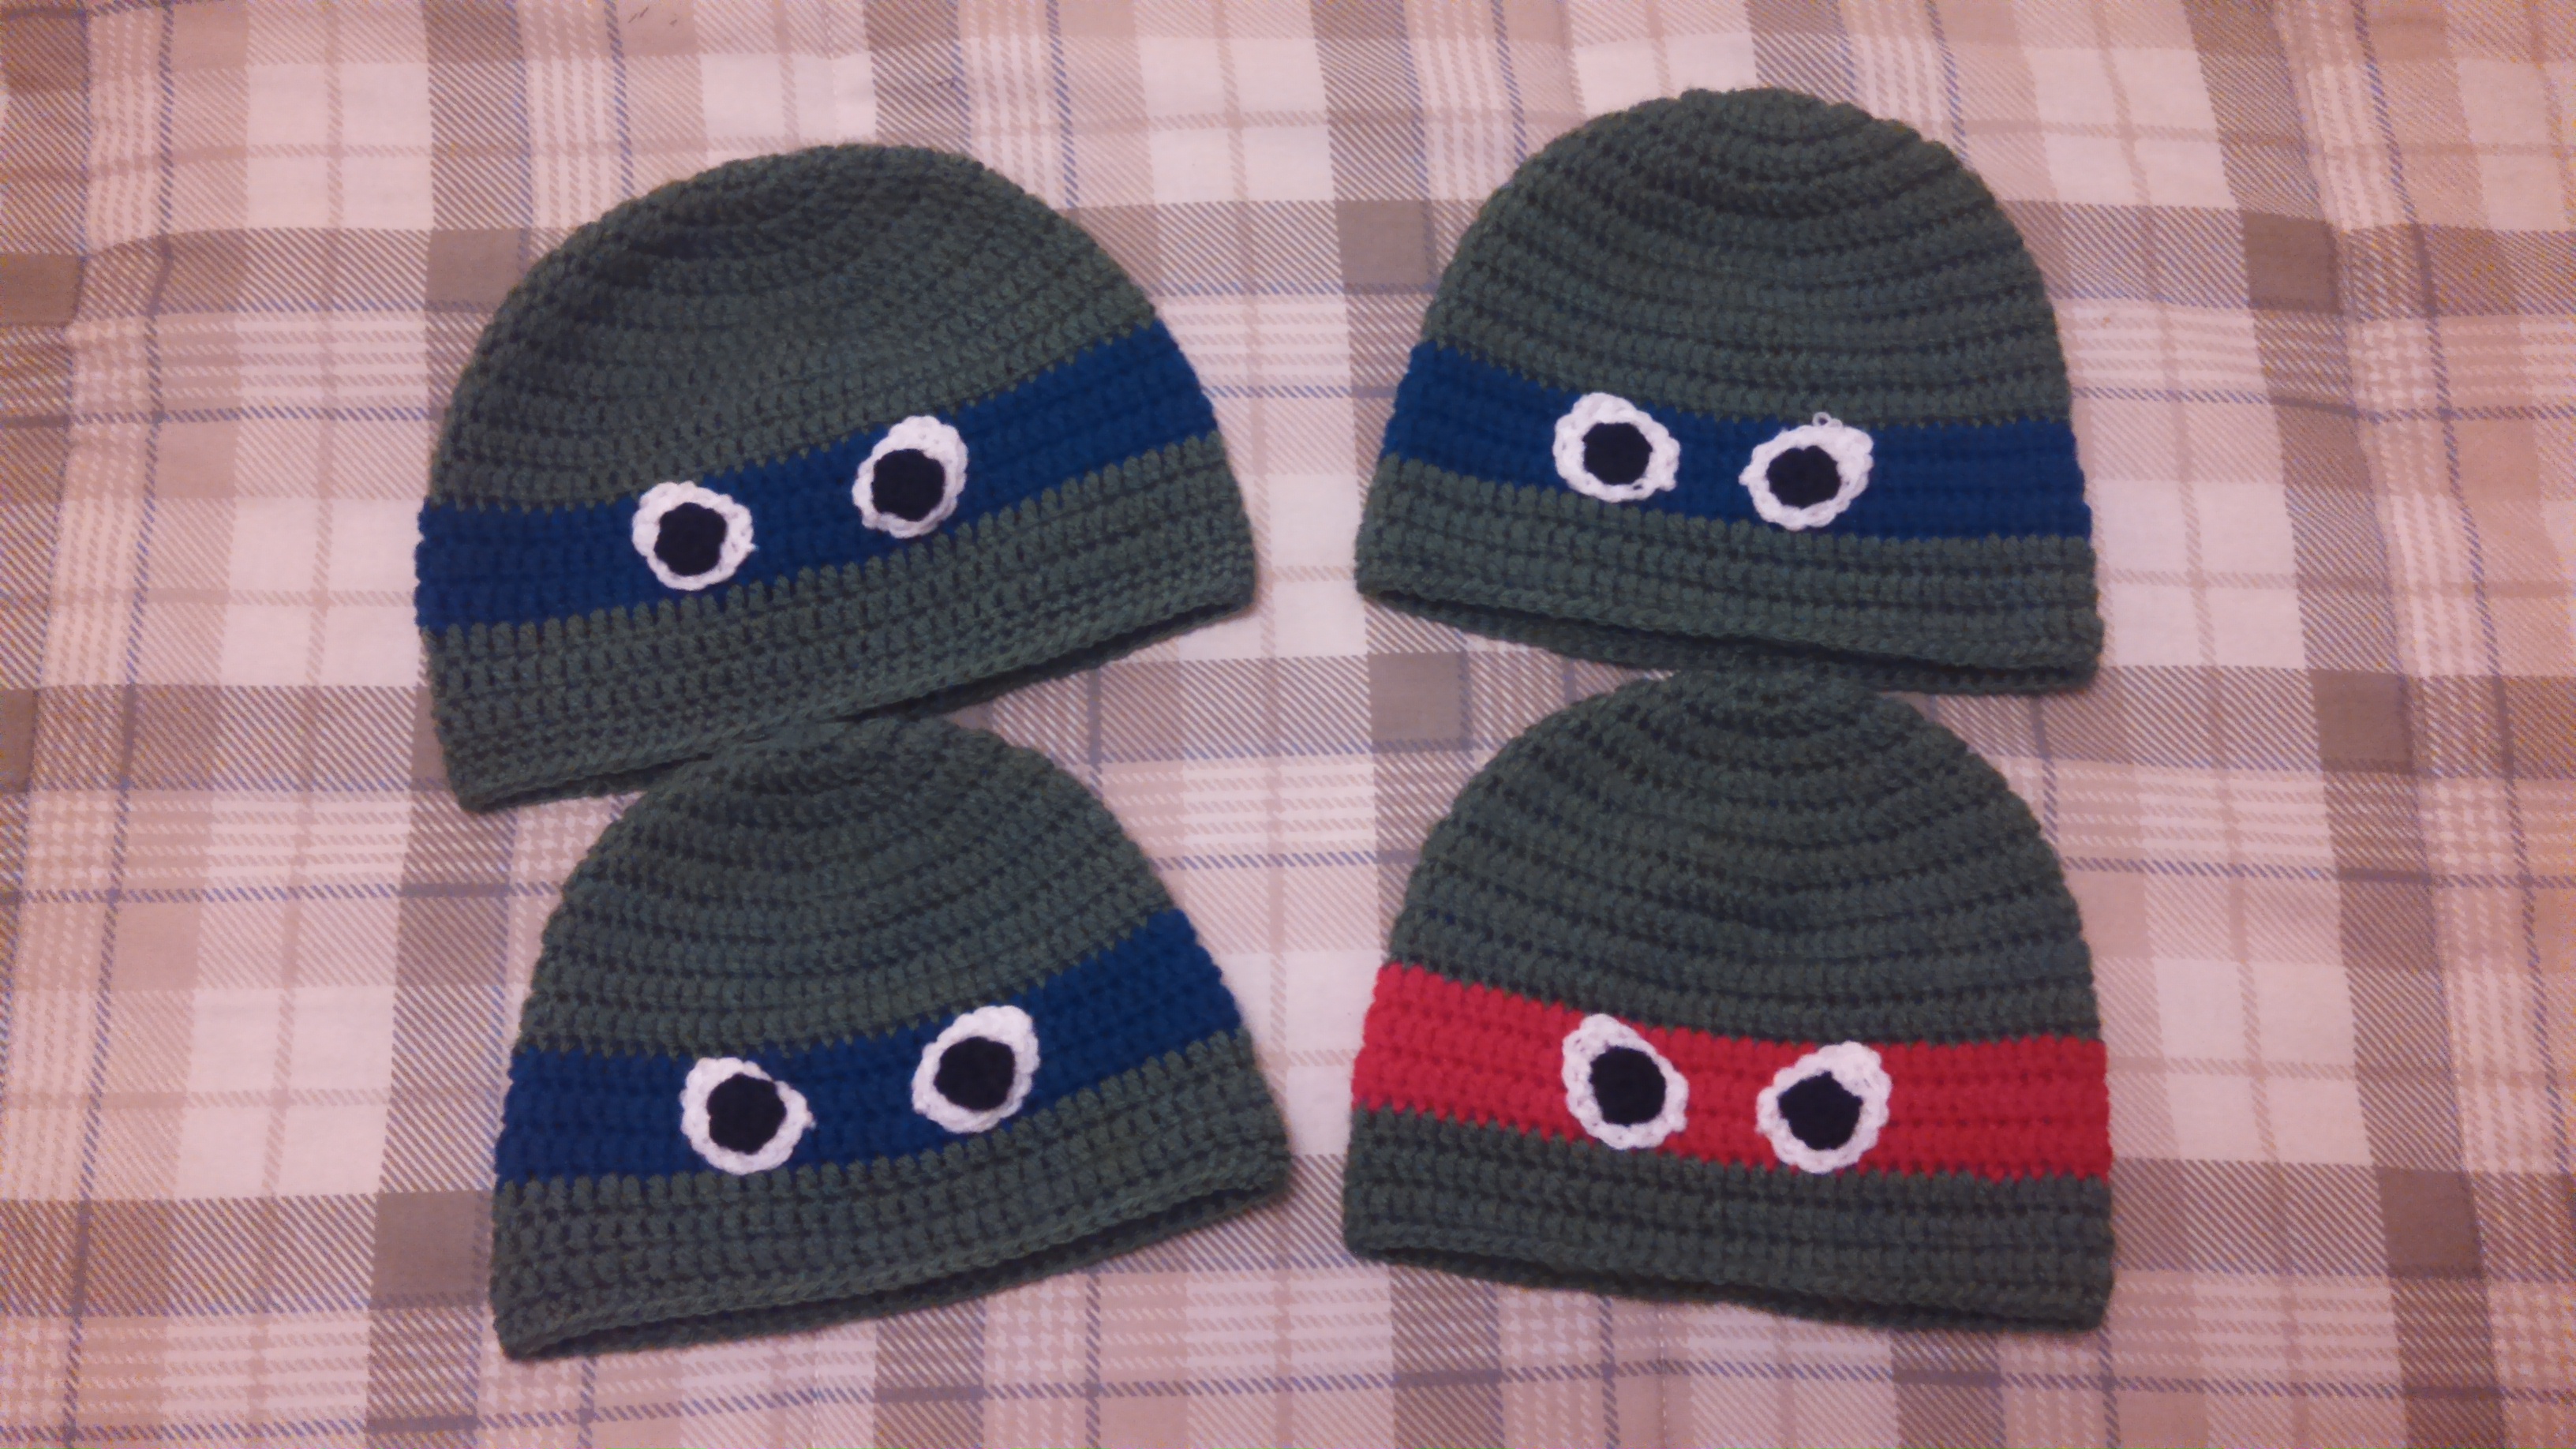
Front of Ninja Turtle Hat

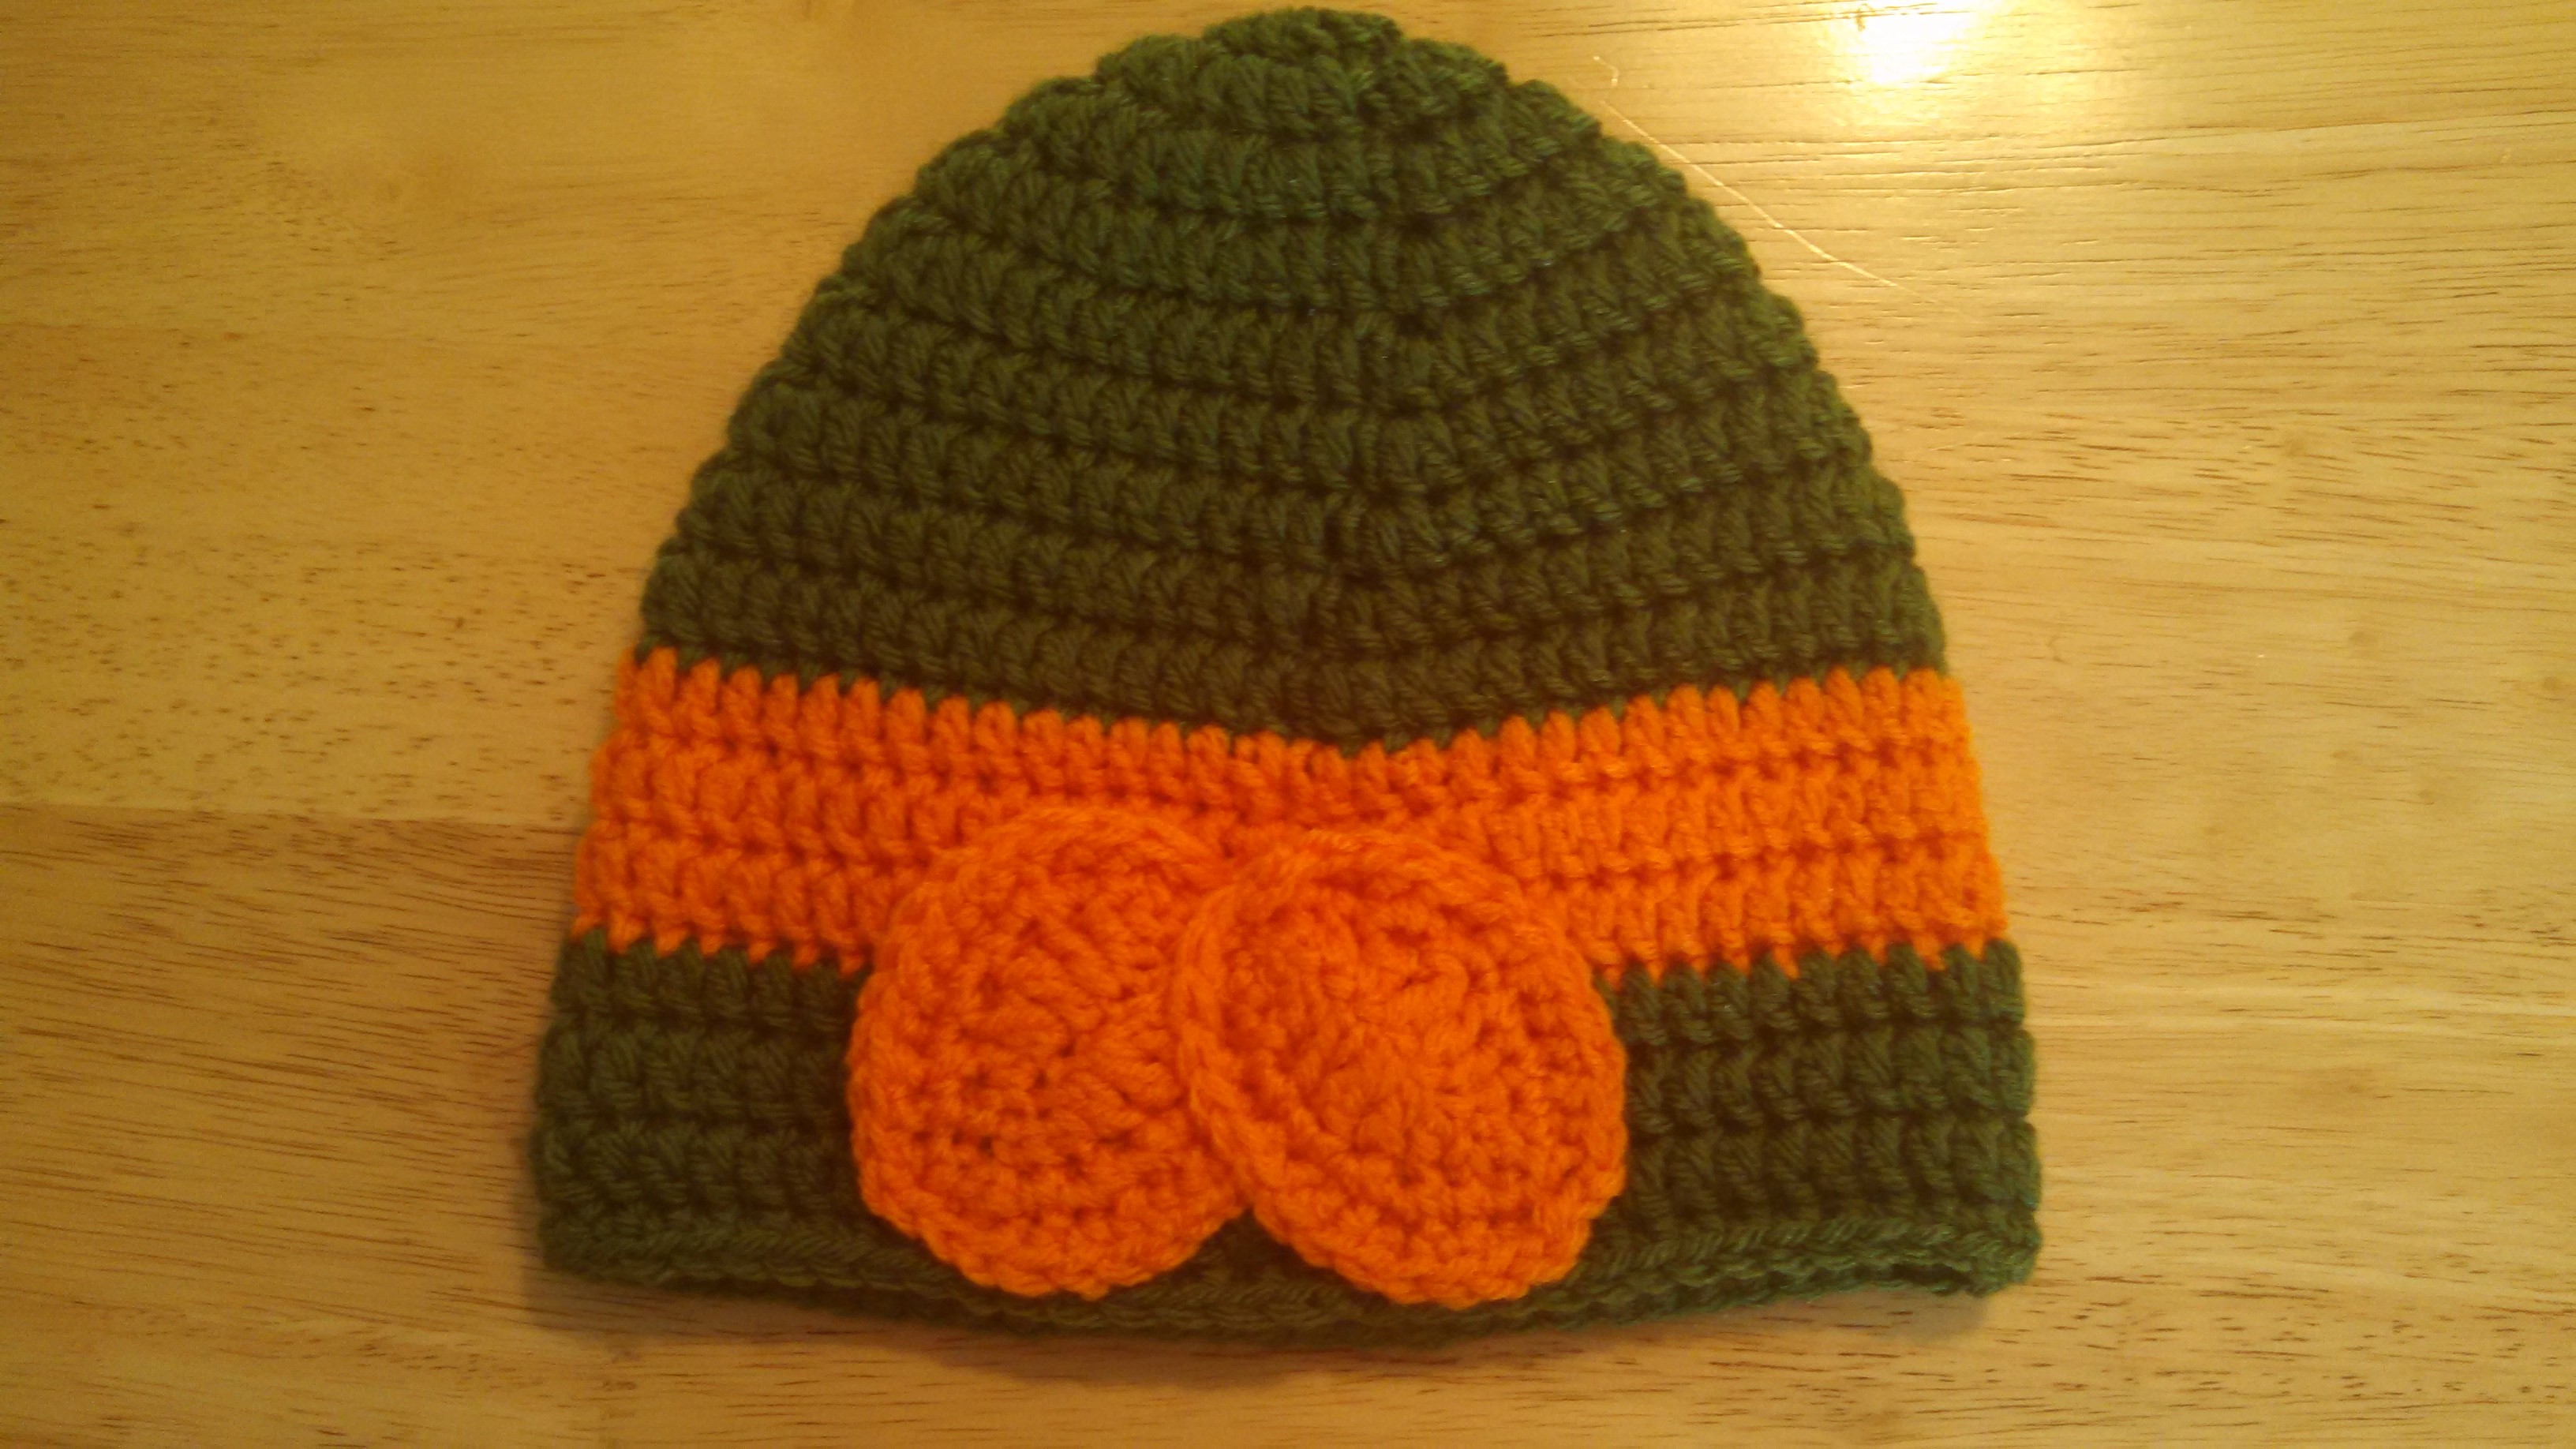
Back of Ninja Turtle Hat

Orange and Purple Ninja Turtles

Blue and Red Ninja Turtles

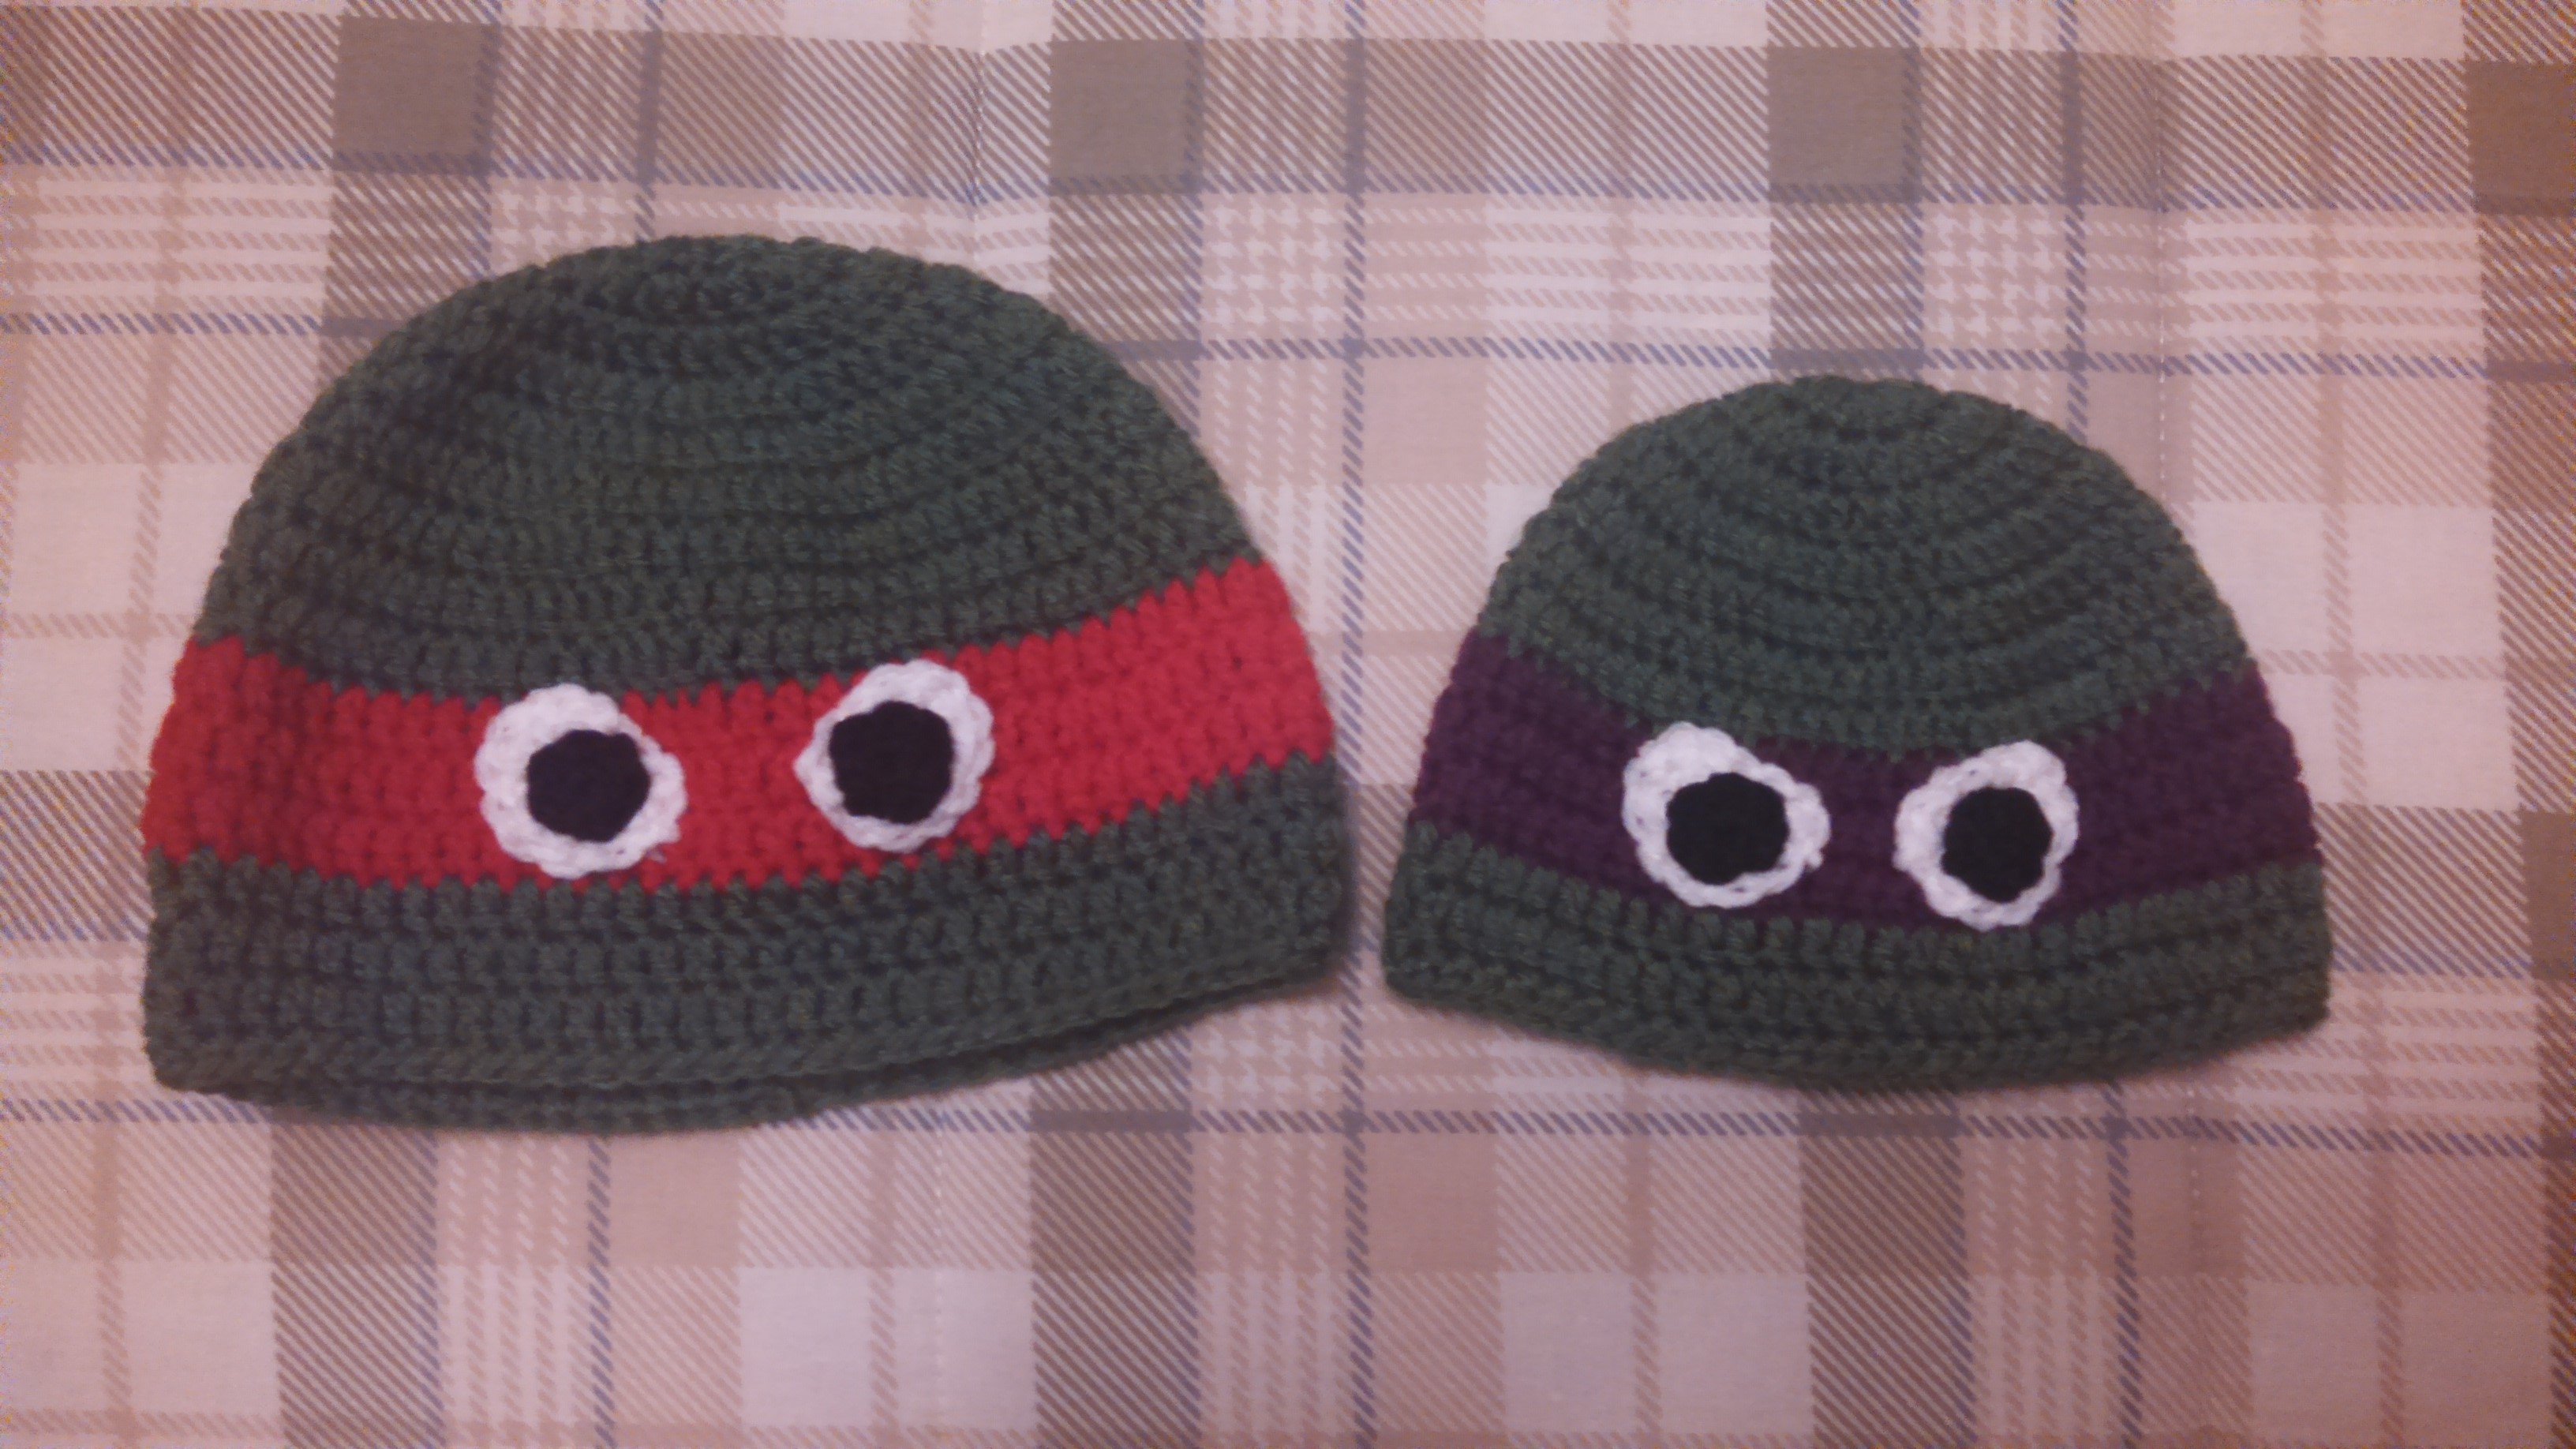
Red and Purple Ninja Turtles
Links to patterns for Ninja Turtle hats:
TUTORIAL – Crochet TMNT Hat
Free Ninja Turtle Hat Crochet Pattern

Minions
Link to pattern for Minion hats: http://www.repeatcrafterme.com/2014/01/crochet-minion-hat-pattern.html. I did the first as HDC in pattern, then switch to the DC pattern I posted above, doing the black as 2 rows DC. I didn’t do earflaps, and did the last 2 rounds of the hat in royal blue.

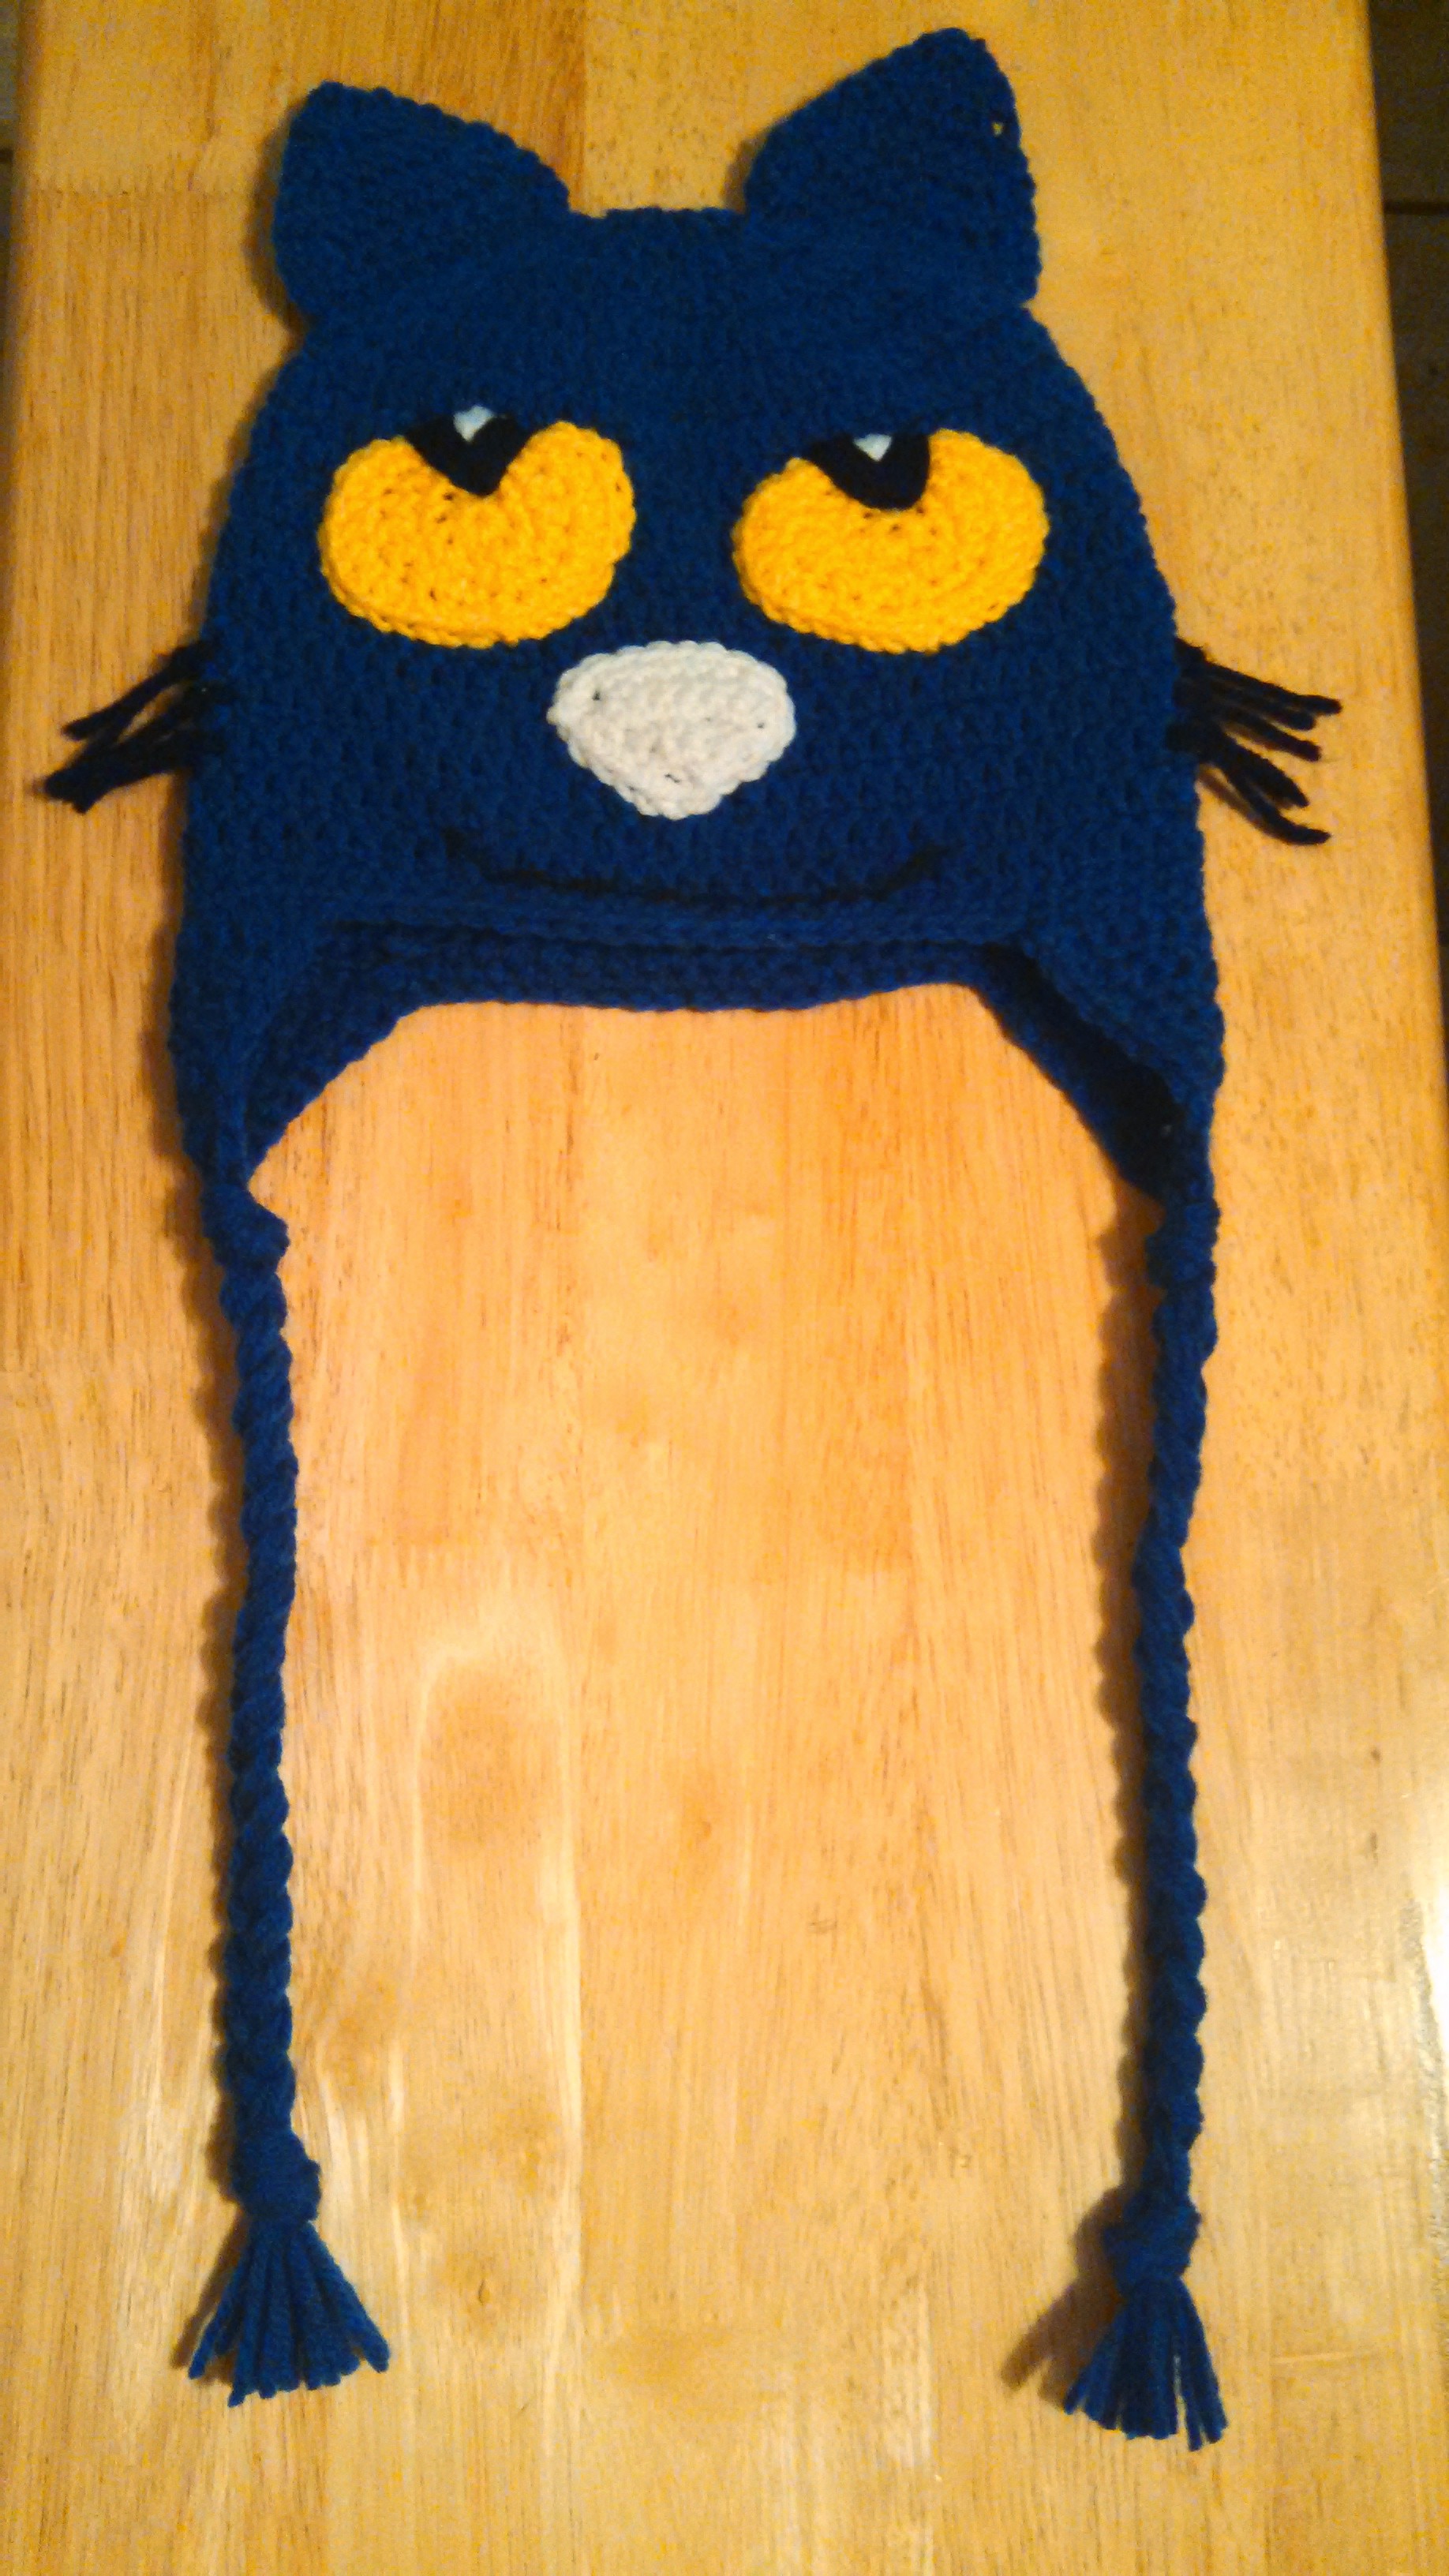
Pete the Cat
Link to cat hat that helped inspire Pete the Cat: http://www.repeatcrafterme.com/2014/09/crochet-black-cat-hat.html
Link to pattern for earflaps and tails: http://www.repeatcrafterme.com/2013/01/crochet-puppy-hat-pattern.html
Changes from pattern
- No inner ear
- Eyes Magic ring, chain 1 and SC 8, join, ch 1 (8 SC) Round 2: 2 SC in each stitch around, join, ch 1 (16 SC) Round 3: 2 SC in first two stitches, HDC in next, 2 DC, HDC, 4 SC, HDC in next, 2 DC, HDC, 2 SC. Round 4: 2 SC in first stitch, 2 SC in next, 2 HDC, 2 DC in next 2, 2 HDC, 2 SC in next 4, 2 HDC, 2 DC in next 2, 2 HDC, 2 SC in next 2. Fasten off leaving long tail to sew onto hat.
- After attaching eyes to hat, make a triangle with black yarn stitches, then smaller triangle in white.
- Nose Ch 2. Row 1: SC in first chain. Ch 1 and turn. Row 2. 3 SC in stitch. Ch 1 and turn. Row 3: 2 SC in first stitch, SC in next, 2 SC in last stitch. Ch 1 and turn Row 4: SC across (5). Ch 1 and turn. Row 5: 2 SC in first stitch, SC in next 3, 2 SC in last stitch. Ch 1 and turn Row 6: SC across (7). Ch 1 and SC all around. Fasten and leave long tail to attach to hat.

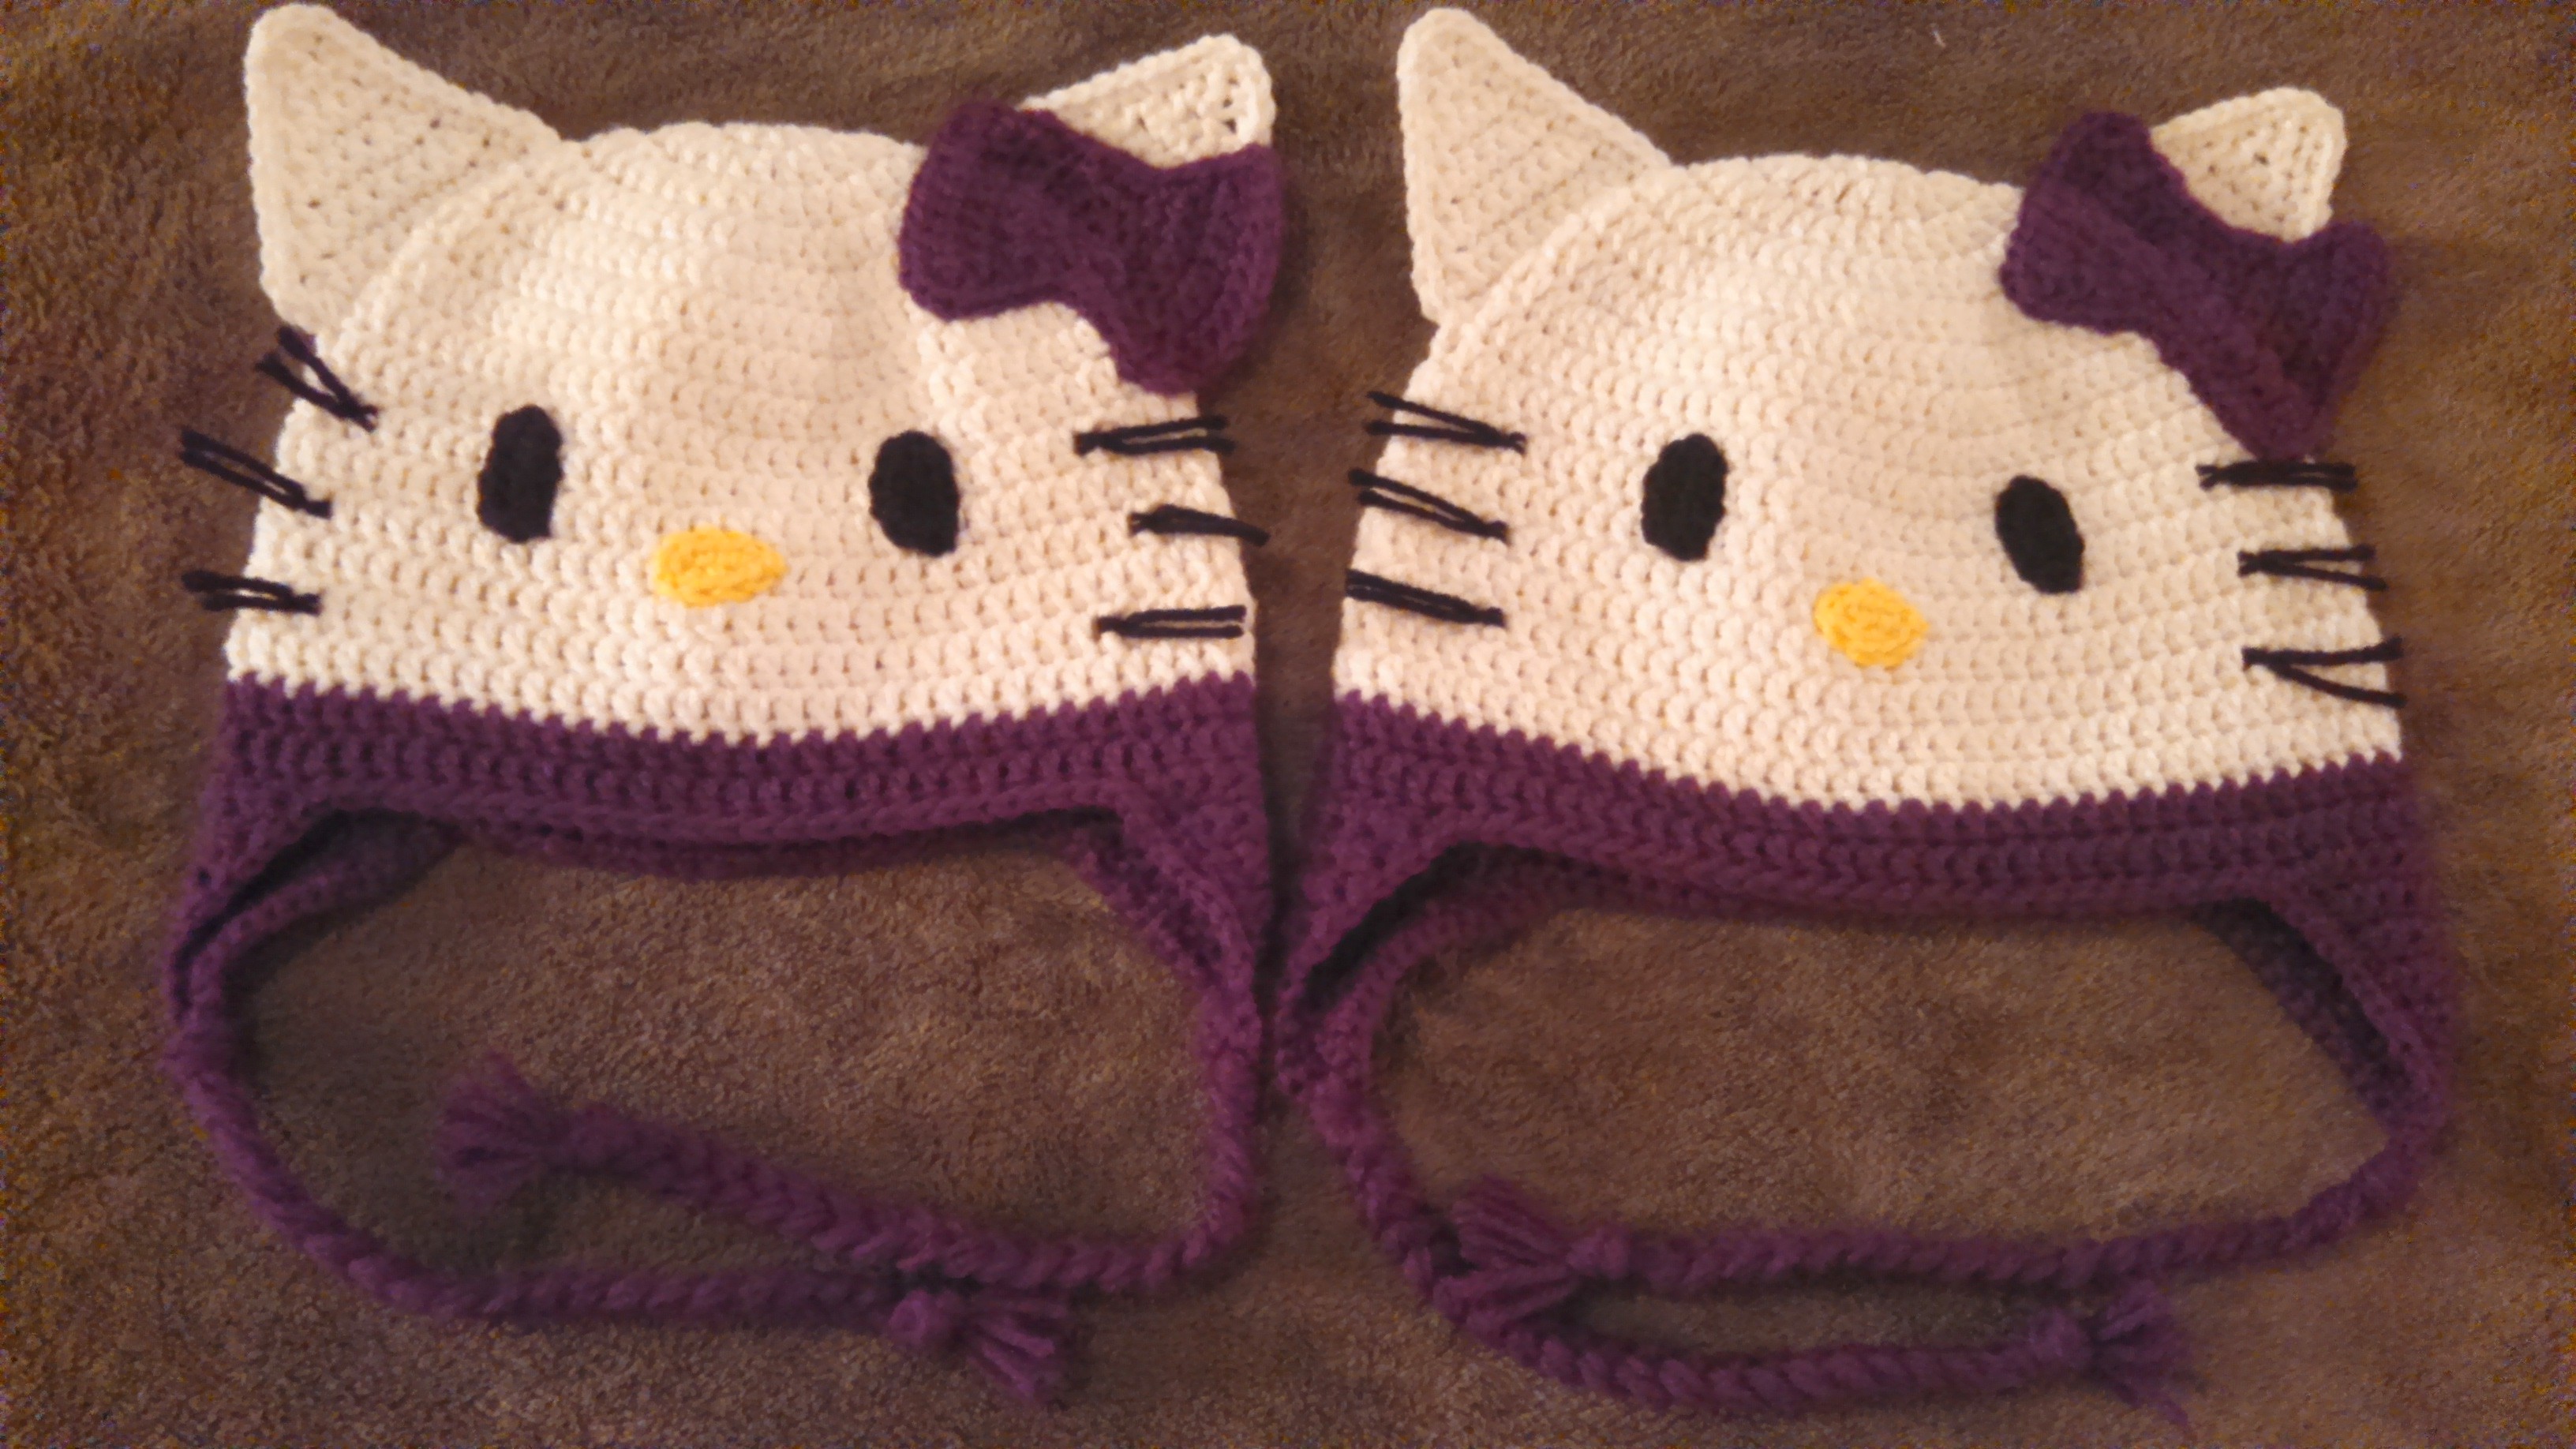
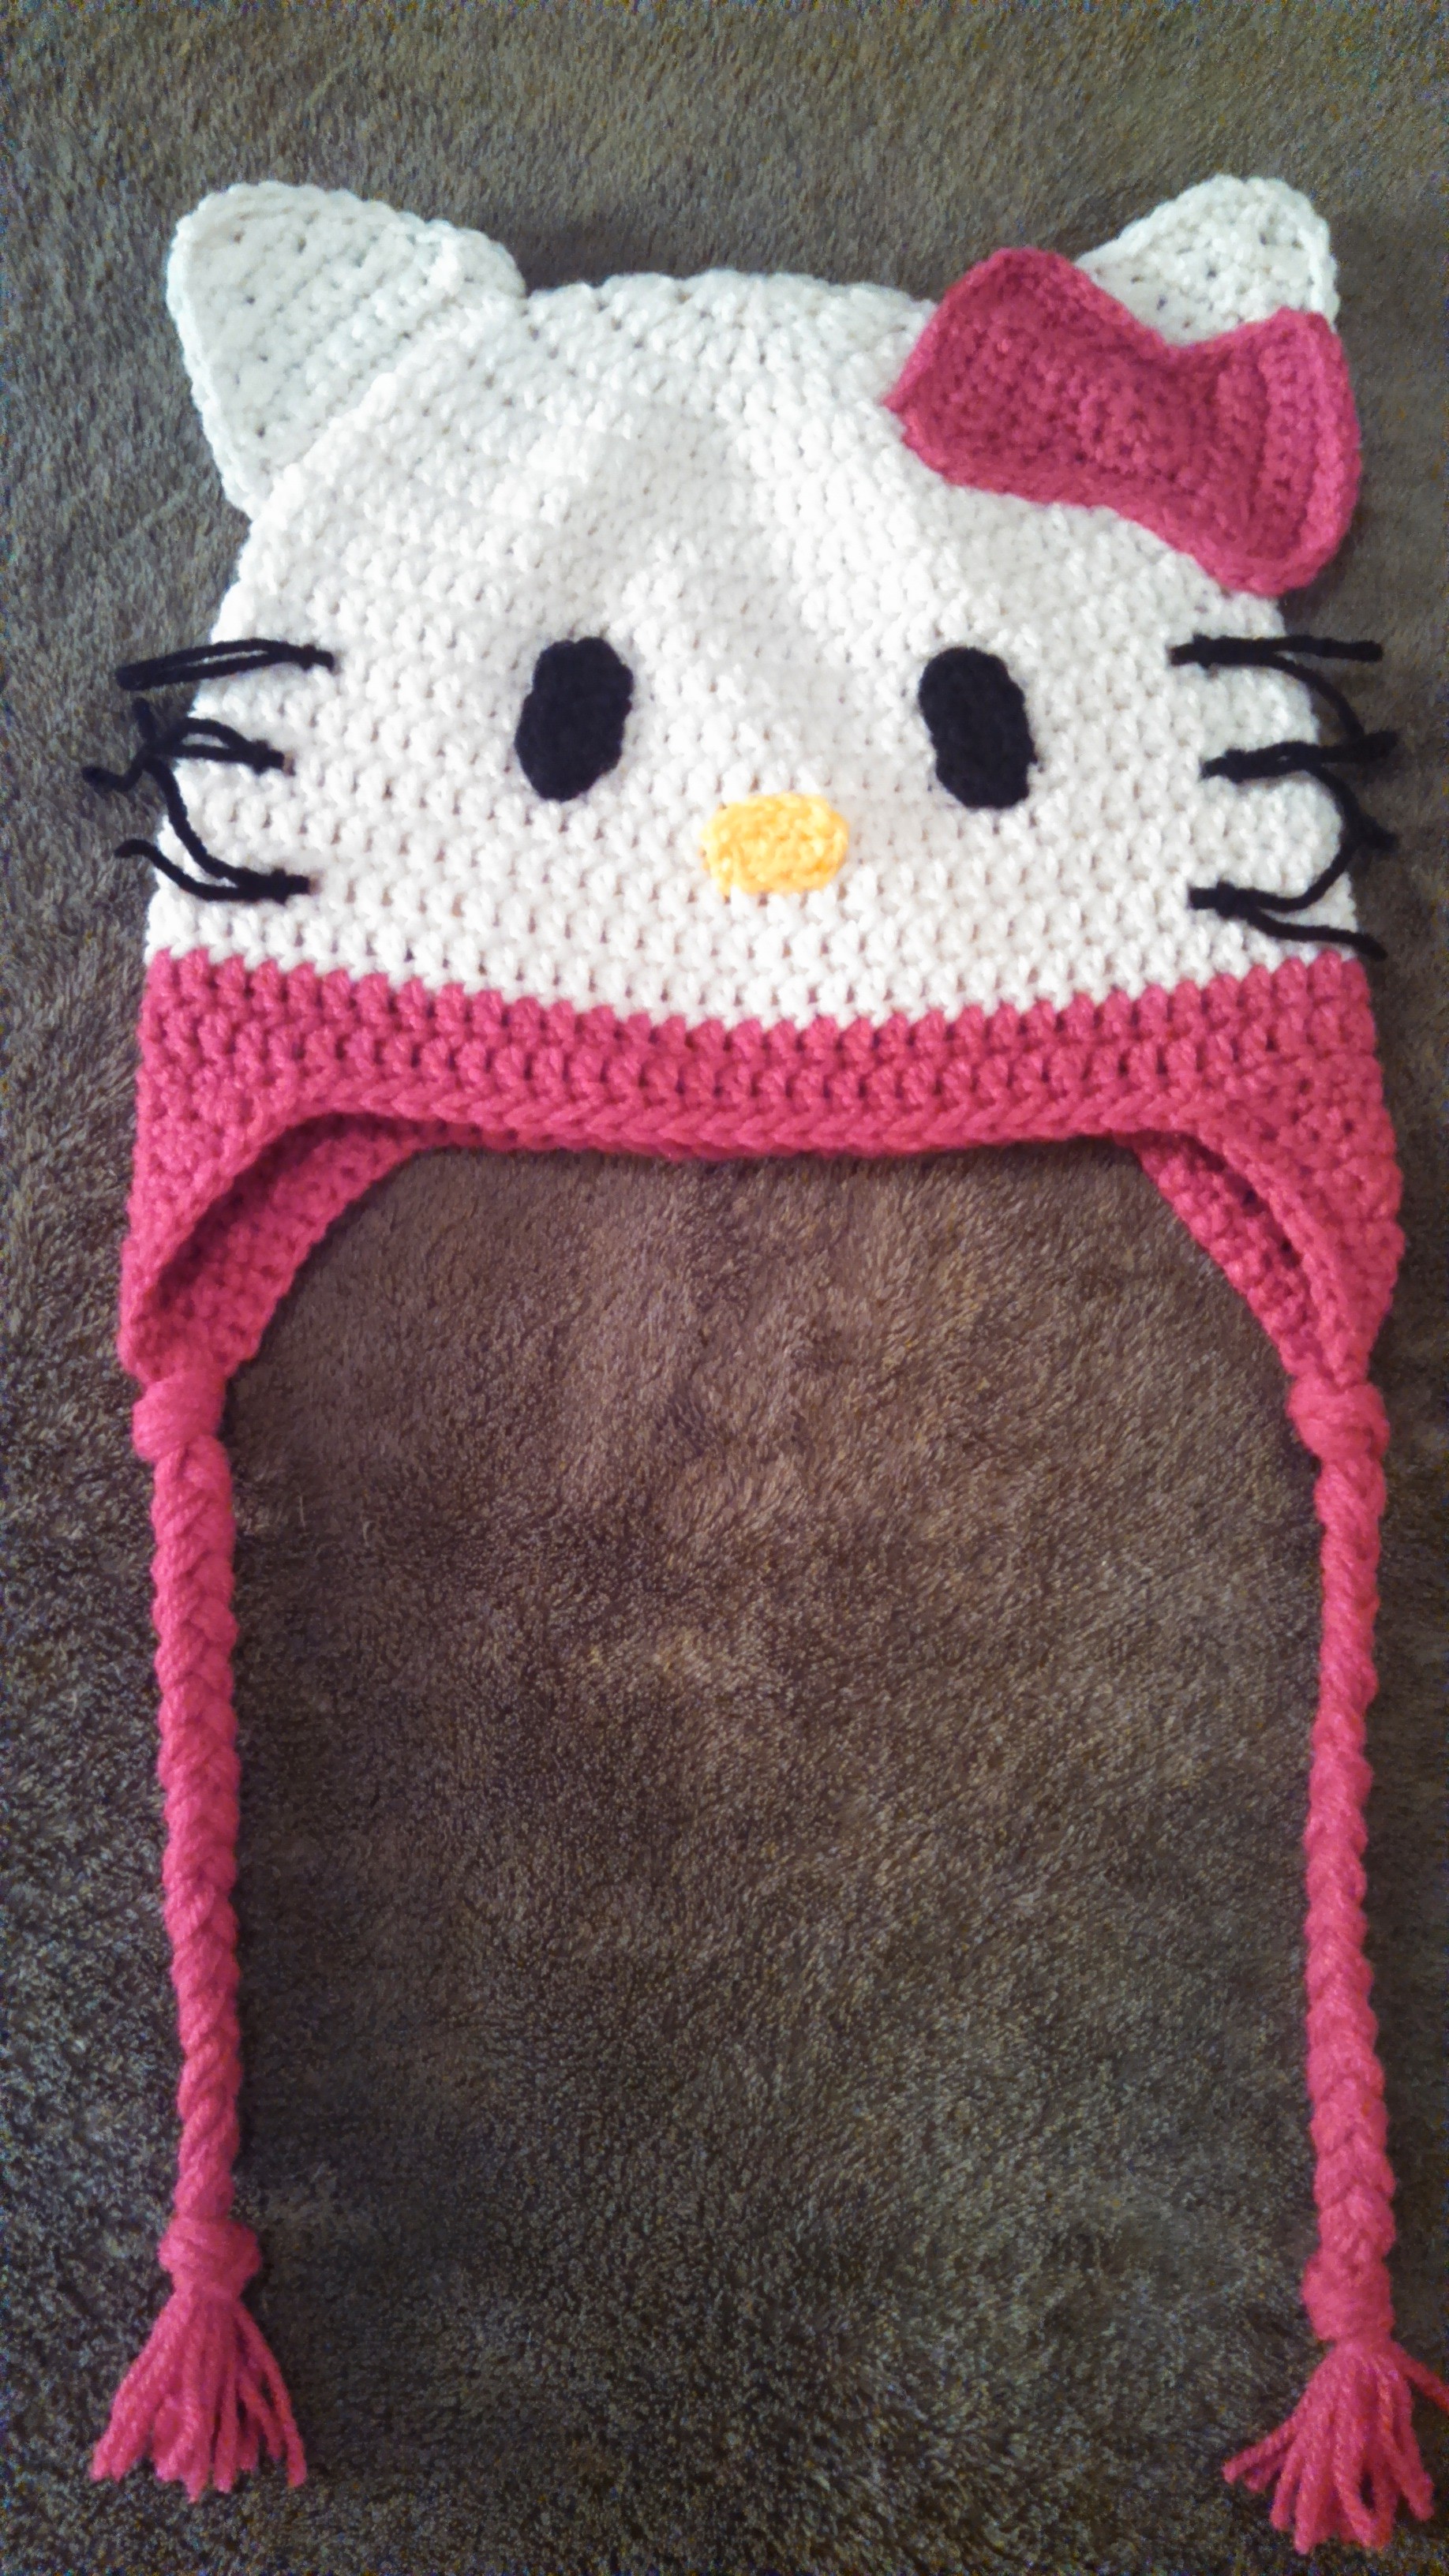
Hello Kitty
Link to pattern for the ears: http://www.repeatcrafterme.com/2014/09/crochet-black-cat-hat.html
Link to pattern for the eyes and nose: http://crochetincolor.blogspot.com/2012/03/hello-kitty-hat-pattern.html.
Link for earflaps and tails: http://www.repeatcrafterme.com/2013/01/crochet-puppy-hat-pattern.html
I made up my own pattern for the bow.

Red Angry Bird
Link to pattern for Angry Birds: http://amray1976.blogspot.com/2011/12/crochet-angry-bird-child-hat.html. Instead of the tan bottom, I switched to tan yarn for part of the last few rounds to make more of a tan belly look. The beak I created my own pattern, making 2 triangles similar to the nose on the Pete the Cat hat.
Tags: beanies, crochet, hats