Chicken and Gnocchi Soup

31 Mar

This has been on my list of things to try making for a while.  Our main Olive Garden favorite is Zuppa Toscana, which I still make regularly, but I still wanted to give this one a try.  It is actually really easy to make and doesn’t take too long to make.  For the gnocchi, you have the option of buying at the store (usually in the pasta, refrigerated, or frozen section) or making your own.  I had a leftover baked potato in the fridge, so I decided I would try making my own.  It’s not too hard either, just a little time-consuming.  I’ll give the recipes for both.

Potato GnocchiPotato Gnocchi

What you need:

1 large russet potato, weighing about 1 pound
1 egg yolk
3/4 cup flour, plus more for work area
Pinch of salt

How to make it:

First, bake potatoes. I used a potato that I had baked in the slow cooker earlier in the week.  If you don’t have an already baked potato, preheat oven to 350 F.  Pierce potato with a fork all around potato.  Bake for about 1 hour, or until potato is very soft.  Remove potato to a rack and cut open to allow to cool.

Scoop out the insides of the potato and discard skins (or save skins for some other use).  Pass the potato through a potato ricer or run along a small grater.  Add the egg yolk, flour, and salt, and mix by hand until you get a ball of dough.

Flour your work area.  Take a small ball of the dough and gently roll on your work surface until you have a long roll about 3/4″ in diameter.  Cut off 1″ sections.  Roll each along the back of a fork to get small indentations in each piece.  Place on a cookie sheet lined with wax paper.

Potato Gnocchi waiting to be cooked
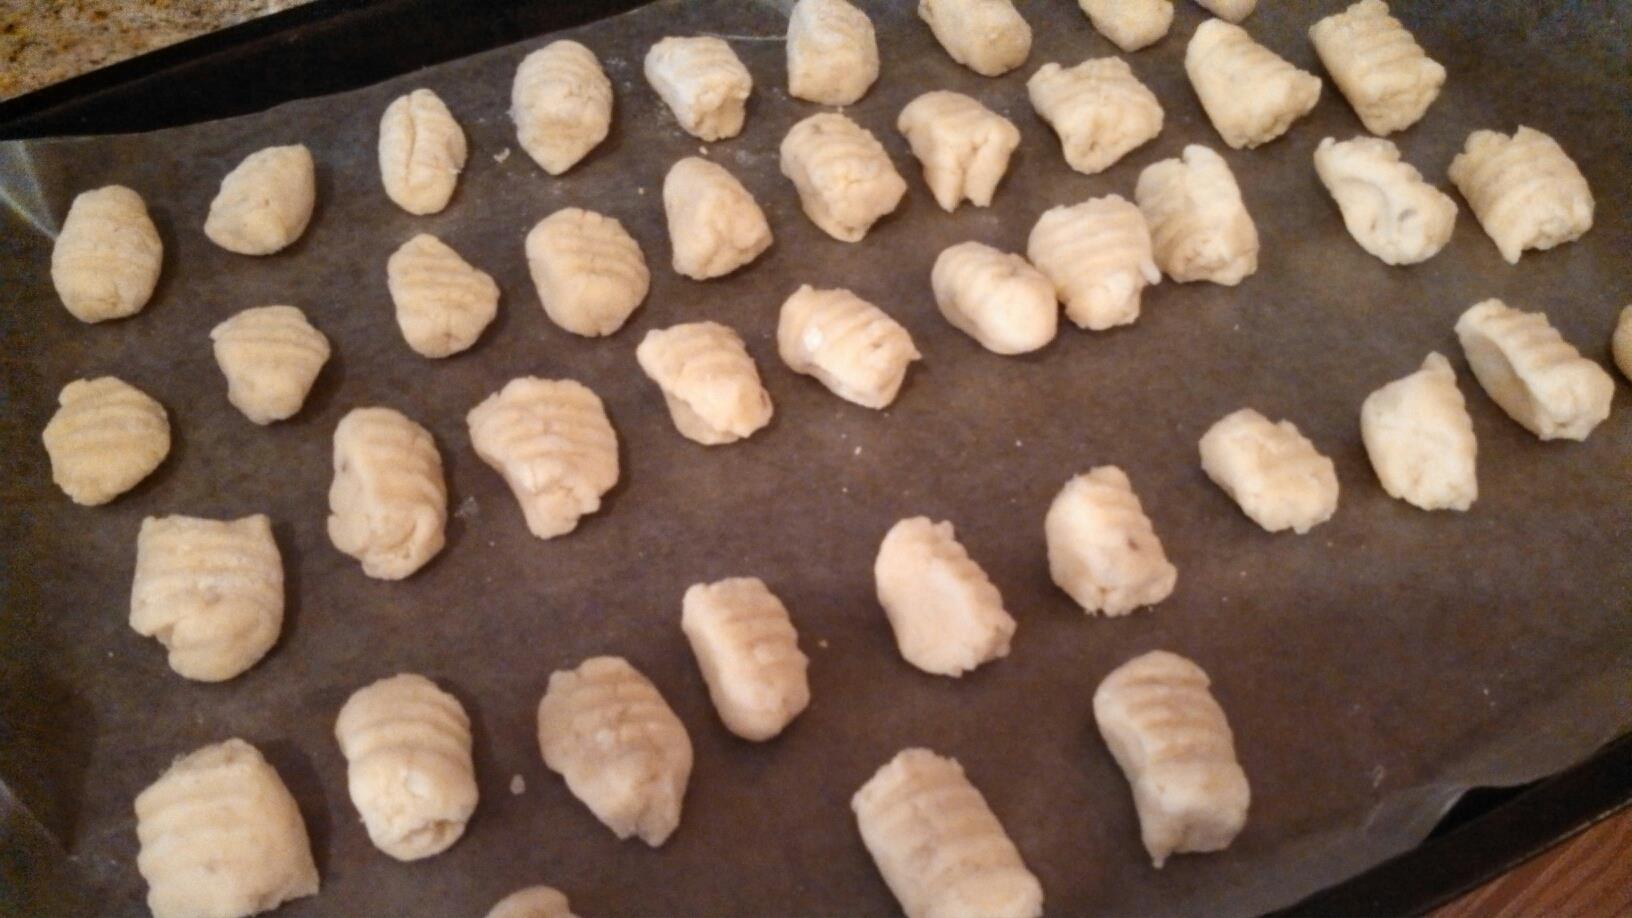
At this point, if you will not be using right away, place the cookie sheet in the freezer.  Once frozen, place gnocchi in a freezer safe bag or container until you will use.

To cook, bring a pot of salted water to a boil.  Gently add gnocchi, a few at a time, to the boiling water.  When they rise to the surface, use a slotted spoon to remove gnocchi.  Repeat for remaining gnocchi.  Serve with sauce or pesto, or set aside to add to soup below.


Chicken and Gnocchi Soup
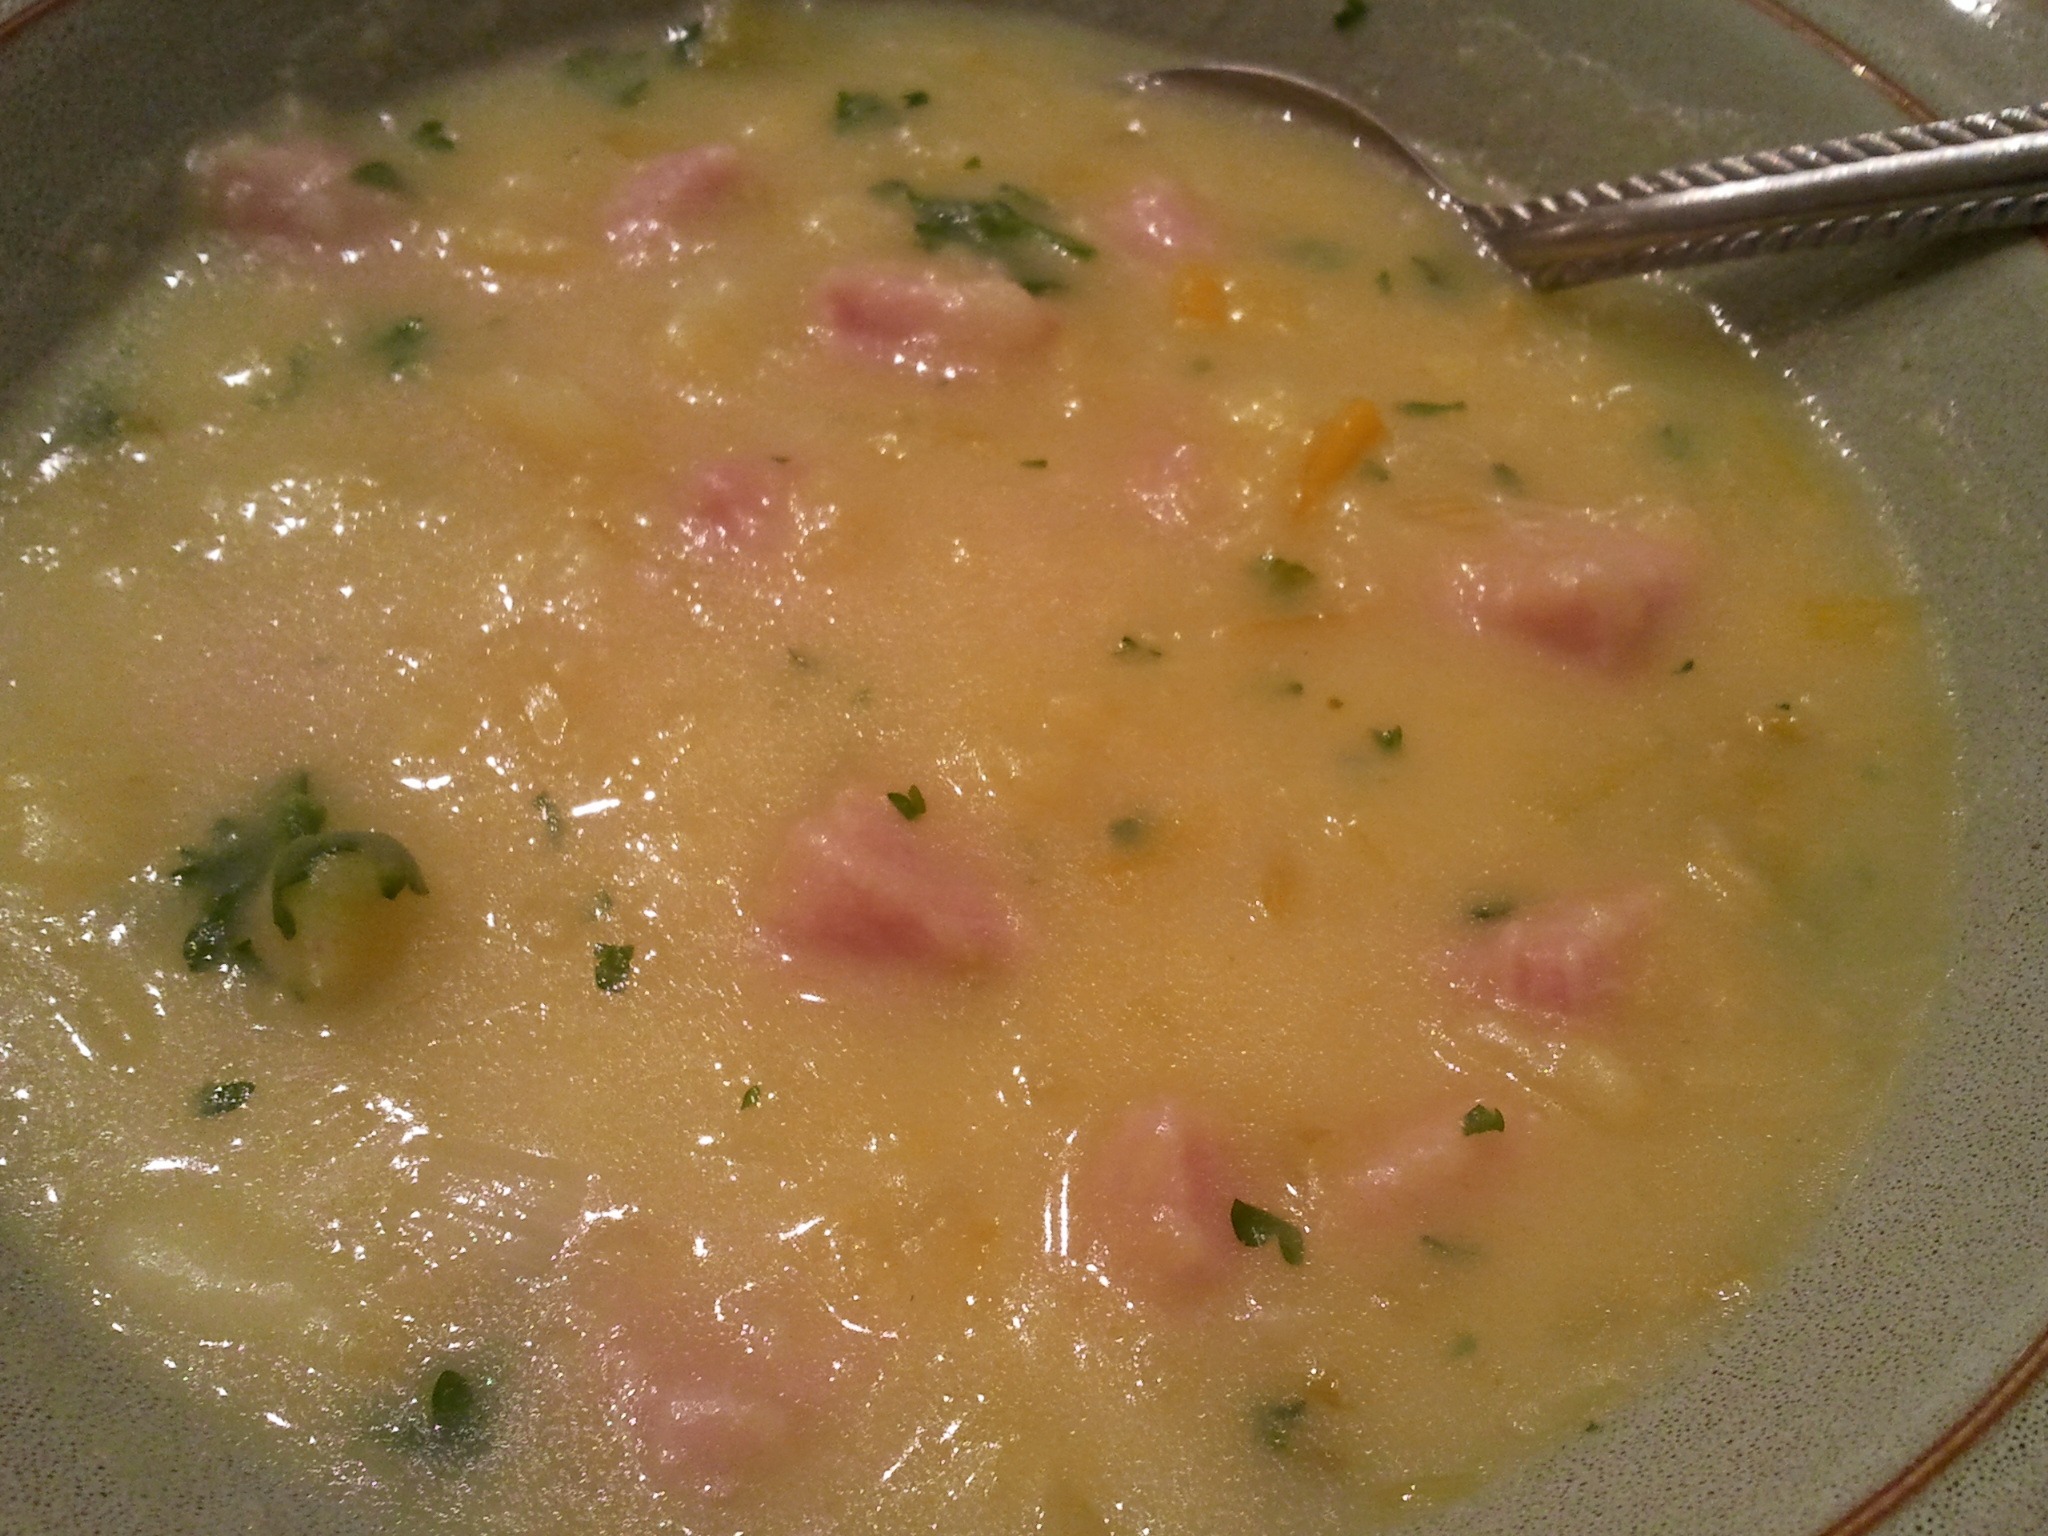
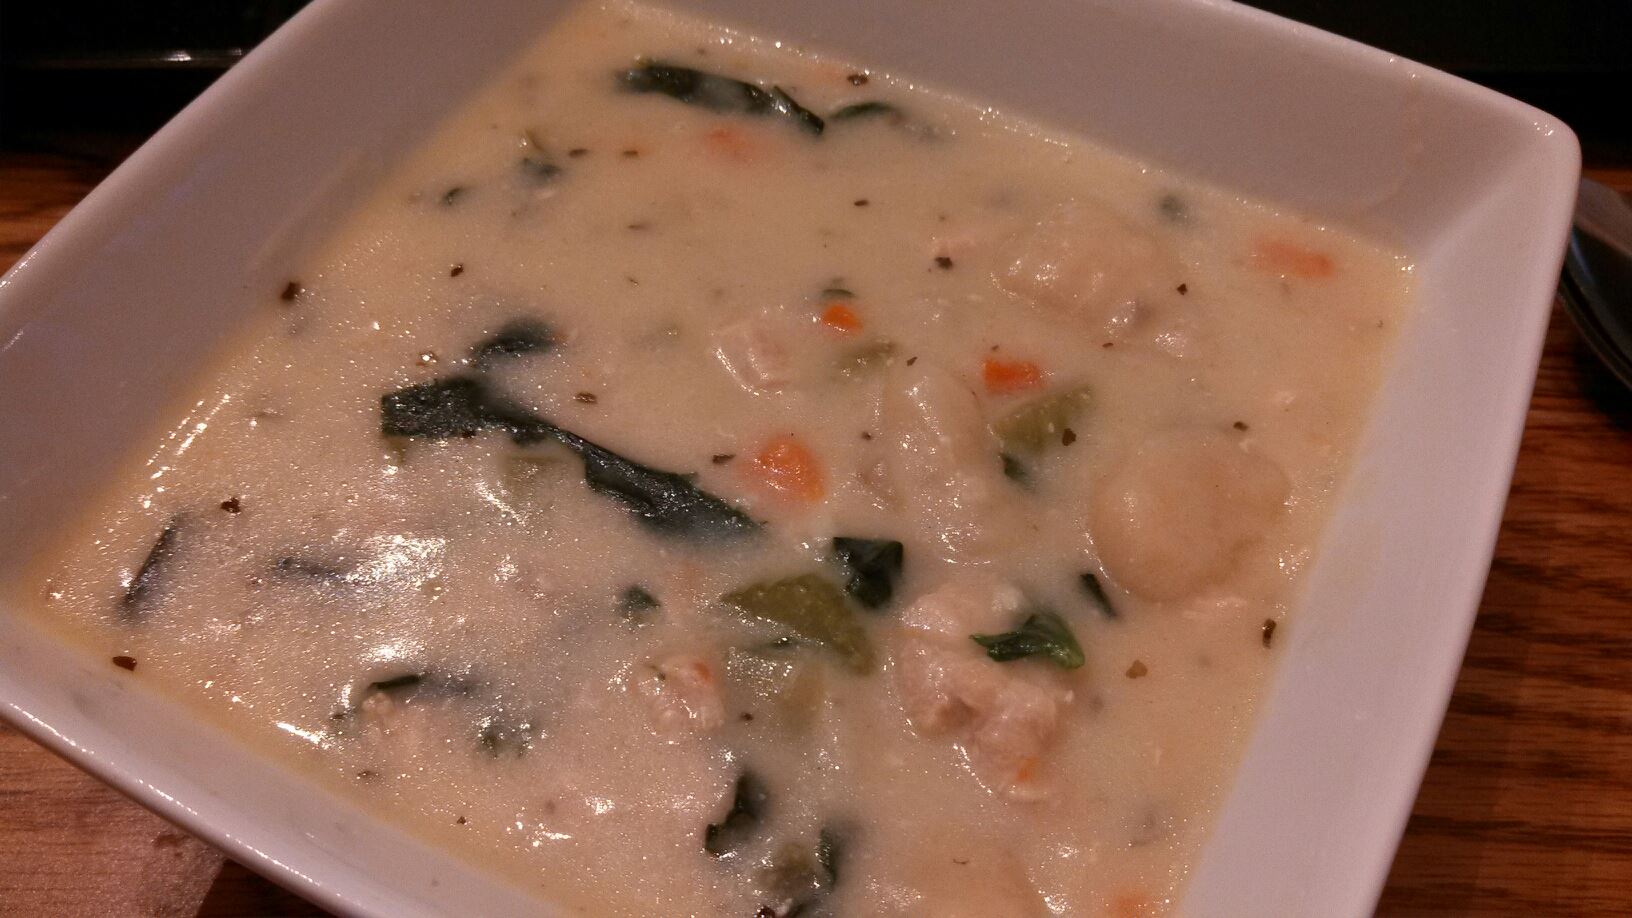
Chicken & Gnocchi Soup

What you need:

1 lb chicken, cut into 1″ cubes (or 2 cups cooked chicken)
3 tablespoons butter
2 tablespoons olive oil
1 small onion, diced
1/2 cup chopped carrots
1/2 cup chopped celery
4 cloves garlic, minced
1/3 cup all-purpose flour
1 1/2 teaspoons dried basil
4 cups chicken broth
1 1/2 cups half and half (I just use 1% milk in all my soups, and it comes out fine)
1 pound potato gnocchi, made as above or cooked according to the package directions
3 cups coarsely chopped spinach leaves
Salt and black pepper to taste

How to make it:

Heat a little olive oil in a large pot over medium-high heat.  Add chicken, and cook until no longer pink inside and slightly browned outside.  Remove from pot and set aside.

Heat the 3 tablespoons butter and 2 tablespoons olive oil over medium heat.  Add the onions, carrots, celery, and garlic.  Cook until vegetables become tender, about 10 minutes.  Mix in the flour, basil, salt and pepper.  Stir continuously for about 5 minutes.

Slowly whisk in the chicken broth and half and half to prevent any lumps from forming.  Bring to a light boil, then reduce heat to low to simmer for 20 minutes, until soup thickens.

Add the cooked gnocchi and spinach to the soup.  Gently stir and cook until spinach wilts.  Serve immediately.


FarmBox Fresh: 3/27/2013

29 Mar

I know I haven’t done this in a while, even though I still get a Farm Box weekly.  But, this week, I was very excited about my box, so I just wanted to share!

Sunizona Family Farms FarmBox 3/27/2013


This week, I did a Custom box and picked:

– Spouted Spelt bread: our favorite sandwich bread, very light and very tasty
– Seedless hothouse cucumber: making refrigerator pickles
– Green beans: My 4-year-old and 6-year-old LOVE green beans and can’t get seem enough of them right now!
– Beets: Making pickled beets and using the water from boiling them to color Easter eggs, hoping it works!
– Radishes: Kids and husband love them!
– Green leaf lettuce: Great for salads for me for lunch

And last, but not least, the item I was most excited about…

PEAS!

Sunizona Family Farms peas


We love peas, but they are usually so expensive or hard to find at the store, and they never seem to make it into the Bountiful Baskets rotation.  So, I was very excited to see them available through Sunizona.  And, they are delicious!  We will probably eat these raw.

Mini Chicken Pot Pies

21 Mar

Once I saw a picture of these, I knew it was something I wanted to try.  What’s funny is that 2 different friends on Facebook posted pictures with recipes that were similar, yet different.  So, I picked this version to try first, and may try another version in the near future.  I did modify from the original a bit.  It called for a can of condensed cream of chicken soup, which I am not a fan of, so I substituted butter, flour, milk, and chicken broth.  I also used 1 larger can of Grands biscuits, the can with 8 biscuits.  I took about 1/3 out of each biscuit, and put 2 of the thirds together to make another biscuit, getting 12 biscuits in all.  The whole family liked them!

Chicken Pot Pie Cupcakes
Mini Chicken Pot Pies
Based on recipe here

What you need:

1 pound boneless, skinless chicken breast, cut into bite-size pieces
2 tablespoons butter
2 tablespoons flour
1 cup milk
1/2 cup chicken broth
1/2 teaspoon poultry seasoning
1 cup frozen mixed veggies (I used a mix of peas, carrots, corn, and green beans)
1 cup shredded cheddar cheese
1 can of 8 Grands biscuits

How to make it:

Preheat the oven to 400 F.

In a large skillet, heat some olive oil over medium high heat.  Add chicken and cook until no longer pink inside and a little browned on the outside.  Remove from skillet to a plate.

In the same skillet, melt the butter.  Stir in the flour, stirring continuously.  Whisk in milk and chicken broth.  Let it cook for a few minutes to thicken.  Next, stir in the poultry seasoning, chicken, and mixed veggies.  Remove from heat.

Spray a 12 cup muffin tin with non-stick spray.  Remove about 1/3 from each of the 8 biscuits and use the pieces to form 4 more biscuits, giving you 12 all together.  Spread each biscuit into each muffin cup.  Spoon the chicken mixture into each  biscuit.  Top each with shredded cheese.

Bake in the preheated oven for 15 minutes, or until biscuits are golden brown.

Zaycon Foods Breakfast Sausage

21 Mar

Zaycon Foods recently had another pork event, once again bringing their delicious ham, which of course I ordered.  But, this time, there was breakfast sausage instead of bacon.  I’m just about out of bacon, but decided that we east breakfast sausage quite a bit as well, and it’s also something I can use in other dishes as well.

The unit was 20 pounds, and came in 2 10 pound boxes, and came already frozen.  My only complaint in the packaging was that the bag inside the box was not sealed, and I couldn’t repackage right away, so some got freezer burn.  Each sausage link is 1 ounce, and in a casing.  You can find more information on the sausages here.  Also, here is a picture of the label on the side of the box.

Label on Zaycon Foods Breakfast Sausage

So, I counted out 16 sausages to put in bags to vacuum seal.  I found that the pre-cut quart size FoodSaver bags were perfect for this.

Vacuum sealed breakfast sausage links

We have had this sausage a couple of times now.  I used my electric griddle to cook it along with pancakes for breakfast.  It turned out really well, was easy to cook and tastes good too!

Fruit Butterfly Snack

11 Mar

My older daughter just got her new Highlights magazine in the mail.  Ah, the memories of Highlights magazines from when I was a kid.  I loved the picture search puzzles the most!  Anyway, the You’re the Chef! section of the April 2013 magazine had Butterfly snacks.  They had a few variations with vegetables (lettuce, carrots, grape tomatoes), cheese (sticks and slices), and bread, but we chose to do the fruit one, using a banana, apple slices, yogurt, and raisins.  Here is how it turned out:

Fruit Butterfly Snack


It’s easy!  Place a banana in the middle of your plate, then cut an apple into slices to make the wings.  Spread some yogurt on the apple slices, then put raisins on top of the yogurt.  You could also use some pretzel sticks for the antennae, but we didn’t have pretzel sticks, so we skipped it.  You could use a variety of fruits here, first that comes to mind is orange slices in place of the apple slices.  You could use mint leaves for the antennae as well.

Time to Change Your Batteries!

11 Mar

MAR-2013-Change-Your-Clocks-Email


I’m a day late on getting this posted, but the weekend got away from me!  Hopefully, you all changed your clocks yesterday, unless you live in AZ like me.  I hope that you also changed your smoke alarm batteries as well.

Here is a message from Safe Kids Worldwide:

When it’s time to “spring forward” and change the clocks on Sunday, March 10, make sure to change the batteries in all of your smoke alarms. If batteries were recently changed, it’s still very important to conduct your monthly test of your smoke alarms. It could save a life!

Did you know that having a working smoke alarm reduces a person’s chance of dying in a fire by half?

For the best protection, install smoke alarms on every level of your home, outside every sleeping area, and in every bedroom. Smoke alarms should be mounted high on walls or ceilings and tested monthly.

It’s important to replace smoke alarm batteries at least once a year, unless they’re 10-year lithium batteries. Even if your smoke alarms are hardwired, replace the batteries in case of a chirping sound or a power outage.

Reminder: Smoke alarms do not last forever. The maximum life span is 8-10 years. After that time, the entire unit should be replaced. If the unit does not respond properly when tested, it should be replaced immediately.

Here is a link to more Fire Safety Resources: http://www.safekids.org/safety-basics/safety-resources-by-risk-area/fire-burn-and-scalds/

Now that my kids are older and do regular fire drills at school, we plan to start doing them at home as well.  We will designate a meeting spot outside the house and talk about different ways to get out of the house.

Sausage and Chayote Stew

2 Mar

In last week’s Bountiful Baskets Mexican themed veggie pack, there was a chayote:

Chayote


I had gotten these before in another Mexican themed pack a while back, but this pack only had one.  However, there was zucchini as well, and since chayote is also a member of the gourd family, they both go well in this stew.  Normally, I would put tomatoes in as well, but my husband requested no tomatoes, so I left them out.  This is also similar to the Sausage, Zucchini, and Tomatoes over Rice, but adds a few more ingredients.  I would also suggest serving this over Cilantro Lime Rice, which I didn’t get a chance to make because we had to get to a meeting this week.

Sausage & Chayote Stew


Sausage and Chayote Stew

What you need:

1 pound Italian sausage
1 small onion, chopped
3 cloves garlic, minced
3 chayote squashes, seeded and chopped (I used 1 chayote and 1 zucchini)
3 green chiles, roasted, peeled, seeded, and diced
3-4 tomatoes, cores and seeds removed, diced (about 2 cups diced tomatoes)
1 can black beans, drained
1 cup frozen corn
Salt and pepper to taste

How to make it:

Place a large pot over medium-high heat.  Remove casings from sausage, crumble, and cook in the skillet until browned.  Add the onion and garlic to the skillet.  Cook and stir until the onions are translucent, 3 to 5 minutes. Add the chayote squash and green chiles.  Cook and stir until the squash begins to soften, 10 to 15 minutes. Stir in the tomatoes, black beans, and corn.  Season with salt and pepper to taste. Cook until completely heated through, about 10 minutes more.  Remove from heat and serve over rice.

Variations on Potato Leek Soup

2 Mar

After ending up with plenty of leeks and gold potatoes after Bountiful Baskets last week, we’ve been enjoying plenty of Potato Leek Soup.  However, my husband complains about the lack of meat.  So, I tried a couple different variations this week, and they were great!

Potato Leek Soup with Sausage:  While soup is cooking, crumble and brown 1 pound of Italian sausage.  Drain excess fat.  Stir into finished soup.

Potato Leek Soup with Sausage


Potato Leek Soup with Ham: After soup has finished cooking, add in 2 cups of fully cooked ham (such as Zaycon Foods ham)

Potato Leek Soup with Ham


I will update the original post for Potato Leek Soup with these variations as well!

Fun Lunch Containers

24 Feb

Just before the start of the school year this fall, I came across a deal for Bright Bins on Mamabargains for $8 each.  Since the school that my children attend does not have hot lunch and I have to make a lunch everyday for my older daughter, I thought it would be nice to have a reusable container to use for their lunches.  Here is one of her first lunches that I made in the Bright Bin:

Bottom part of Bright Bin packed with baby carrots, grapes, and honeydew

Bottom part of Bright Bin packed with baby carrots, grapes, and honeydew

Top half of Bright Bin packed with a cookie and turkey and bread "sushi"

Top half of Bright Bin packed with a cookie and turkey and bread “sushi”

Bright Bin packed in insulated lunch box with Thermos FUNtainer of water

Bright Bin packed in insulated lunch box with Thermos FUNtainer of water

I occasionally used the silicone muffin cups shown to help divide things up more.  The Bright Bin lasted about half the year, when the top latch broke.  It’s still usable if you use a rubber band around the whole bin to keep it together.  I started using the second one I purchased instead.  However, the top part is pretty shallow, so if my daughter wants something besides a sandwich for her lunch, it’s not ideal.

So, a friend of mine had gotten some other lunch containers, and I was admiring them at the park one day when we had a playdate and picnic.  She had sistema Lunch Cube To Go for her girls to pack lunches in.  I looked them up online a few times, but didn’t ever get around to ordering.  Then, I noticed that the Safeway in town had a few of the containers, and decided to try a Salad To Go container.  It was exactly what I was looking for so that my daughter could take leftovers for her lunch (she doesn’t mind cold tortellini or lasagna!).  The Salad To Go containers have a tray that fits inside, making a lower section and upper, divided section, along with a fork and knife, plus a small round container.  They are BPA free, microwave safe, freezer safe, and top rack dishwasher safe.

Salad To Go container pieces

Salad To Go container pieces

But, I don’t pack salads in it for her, I pack a full lunch like this:

Salad To Go container packed with cheese tortellini in the lower portion, tangerine and pita chips in the upper portion, and hummus in the small round conatiner

Salad To Go container packed with cheese tortellini in the lower portion, tangerine and pita chips in the upper portion, and hummus in the small round container

Container put back together

Container put back together

Salad To Go in lunch box with Thermos FUNtainer and ice pack

Salad To Go in insulated lunch box with Thermos FUNtainer and ice pack.  I kept the fork and knife out so they wouldn’t get messy inside with the tortellini

So far, it has gone really well with this one.  Both my 6-year-old and 4-year-old can undo and redo the latches, and it has held up well going back and forth to school.

I was just at Safeway again, and they had a whole display of sistema To Go containers, Soup Mug To Go ($6.99), Salad To Go ($7.99), Breakfast To Go ($6.99), and Lunch Cube To Go ($5.99)!

sistema Display at SafewaySo, of course, I had to expand our collection:

sistema Containers

I now have a Salad To Go for each family member, Lunch Cube To Go and Breakfast To Go for each of my girls. My oldest loves pink, so her latches are all pink, my youngest loves blue, so her latches are blue.  My favorite color is purple, so mine is the purple one, and I got a blue one for my husband.

I got the Lunch Cube To Go to have another option for lunches.  It has a large section on top and a divided section on bottom, with a latched cover in between the two sections:

How the Lunch Cube To Go looks opened

How the Lunch Cube To Go looks opened

The Breakfast To Go containers I got for the days that we are running late and have to have breakfast in the car or when we need to pack a breakfast to take along somewhere.  It is similar to the Salad To Go; it has a larger container with a top part that fits in and has a spoon that clips into that top part.  Here is a picture of all the pieces:

Breakfast To Go taken apart to show different sections and the spoon

Breakfast To Go taken apart to show different sections and the spoon

The kids love the new containers, and hopefully we’ll get a lot of good use out of them.


Disclaimer: I did not receive any product from Bright Bins or sistema, I purchased all of these myself and wanted to provide information on how I use them and how they work for us.

Grass Fed Beef from Starbar Ranch

21 Feb

Back at the end of November, I heard about a ranch in the area, Starbar Farm & Ranch, that was gauging interest in grass-fed beef.  I have had grass-fed beef before from another local ranch that sells at the farmer’s market, and have been interested since then in getting more.  So, I was very interested, and also got the opportunity to visit the ranch.

First, Starlene and Barbara are both very welcoming and were happy to show us around the ranch.  Next, we got to learn about their feeding system.  For feed, they grow their own alfalfa hay for feed, using no weed killer or pesticide.  Once this alfalfa is cut down, the cattle graze in the field.  Then, they also use a fodder system to grow feed.  The fodder system was really interesting.  They are large trailers with doors on both ends, and each one is temperature regulated and self-watering.  Trays of barley seed are started on one end, then each day a tray is added, pushing the other trays down through the system.  The barley sprouts hydroponically, and goes from the seed to being feed in 6 days.  The barley mats, referred to as biscuits, are able to be fully consumed by the cattle.  You can see a picture of the system and of the biscuits on their Facebook page.

Then, we walked around to see some of the cattle.  Their property is beautiful.  Open views to mountain ranges, and just lots of open country.  The cattle all looked really good and well-cared for, and they don’t receive hormones or antibiotics.  They have red angus, black angus, hereford and belted Galloways at their ranch, and their goal is to get a very lean beef.  Here is a picture of a belted Galloway calf, only 3 weeks old in this picture:

Belted Galloway calf at Starbar Ranch


So, after the visit, I had to wait patiently until now to get some of the beef.  I chose to get 2 packages of top sirloin steaks (2 to a package), 5 1-pound packages of ground beef, a flank steak, a 3 pound chuck roast, and 4 packages of rib eye steaks (2 to a package).

My grass fed beef order from Starbar Ranch


This came to $152.19.  To see their list of prices, you can visit their website here.  Hopefully, the weather will stay warm here for a little bit so I can grill the steaks.  The chuck roast and flank steak I’m planning to make the sauce I use for barbacoa to make barbacoa again with the roast, and to marinade the flank steak and grill it.  I’ll try to give an update after we have it!